My Workbench
May 2009(using the workbench report July 2009)
We're moving and I'm setting up a new woodshop with enough space (finally) and moderately tall ceilings. My first project was a workbench. I've never had a real workbench. In my last house it was first nailed pine 2x4's left by my contractor and then it was this yellow thing I built.
 |
| my old workbench |
I wanted a 'real' woodworking workbench with some heft. After a moderate amount of browsing the web and the local woodcraft store I finally bought Chris Schwarz's Workbench book and decided to build his Roubo bench shown on the cover here.

I love the heft and totally agree with the 'clamp anywhere' philosophy. My shop is plenty big enough for storage and I don't need shelves under the bench.
Wood selection
Chris recommends using southern yellow pine because it's easy to get 2xs at home depot and the stiffness ranks right up there. They flatten their benches annually. I'm more inclined to a harder wood and less flattening. The usual choice is hard maple but I used white oak because it was substantially cheaper and I like oak. In retrospect I would have really preferred the finer grain of maple.
I bought it online and wasn't sure how many board feet to get. I ordered about 140 bf, or 40% over the calculated board-feet, which really wasn't enough but the board size was pretty good (they were 5/4x6x12 in general). I ended up using SYP for the front and rear stretchers when I ran out of oak.
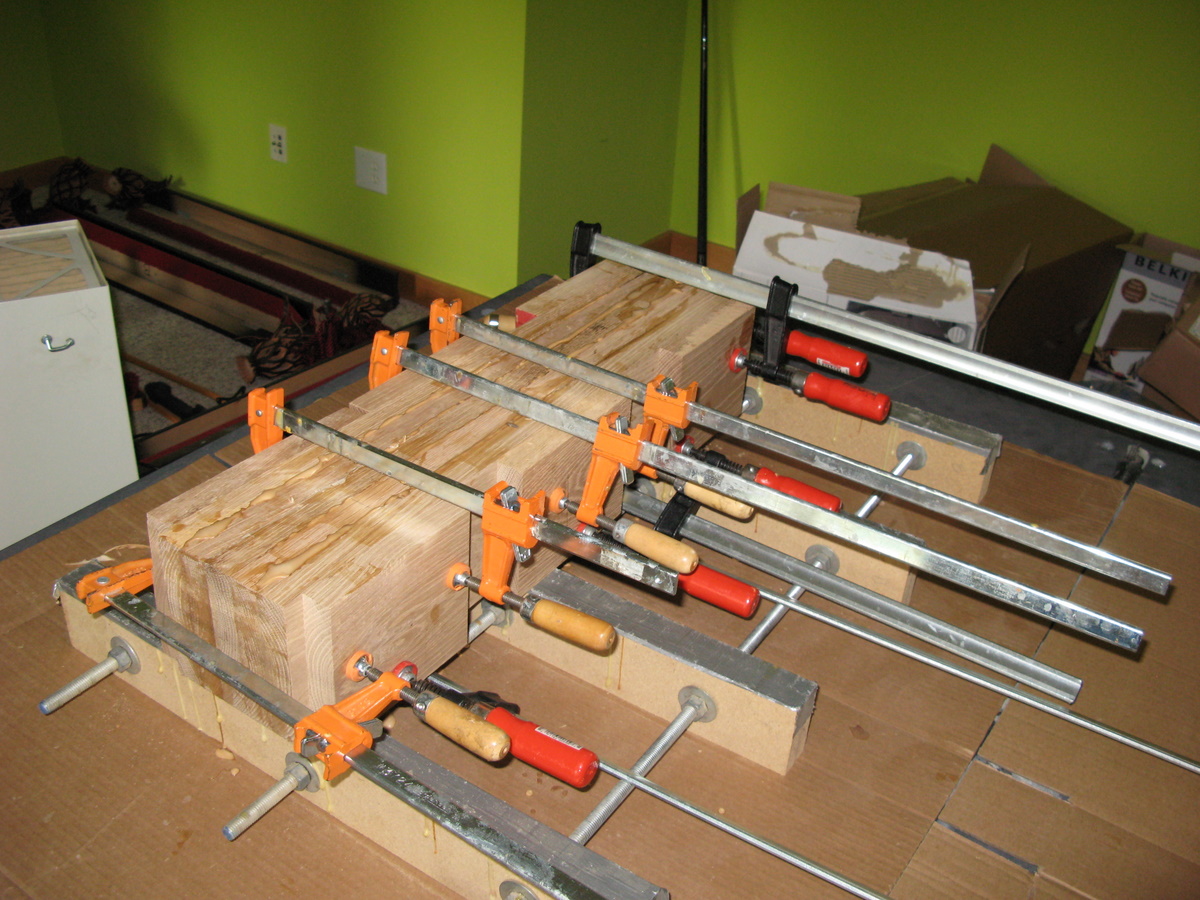
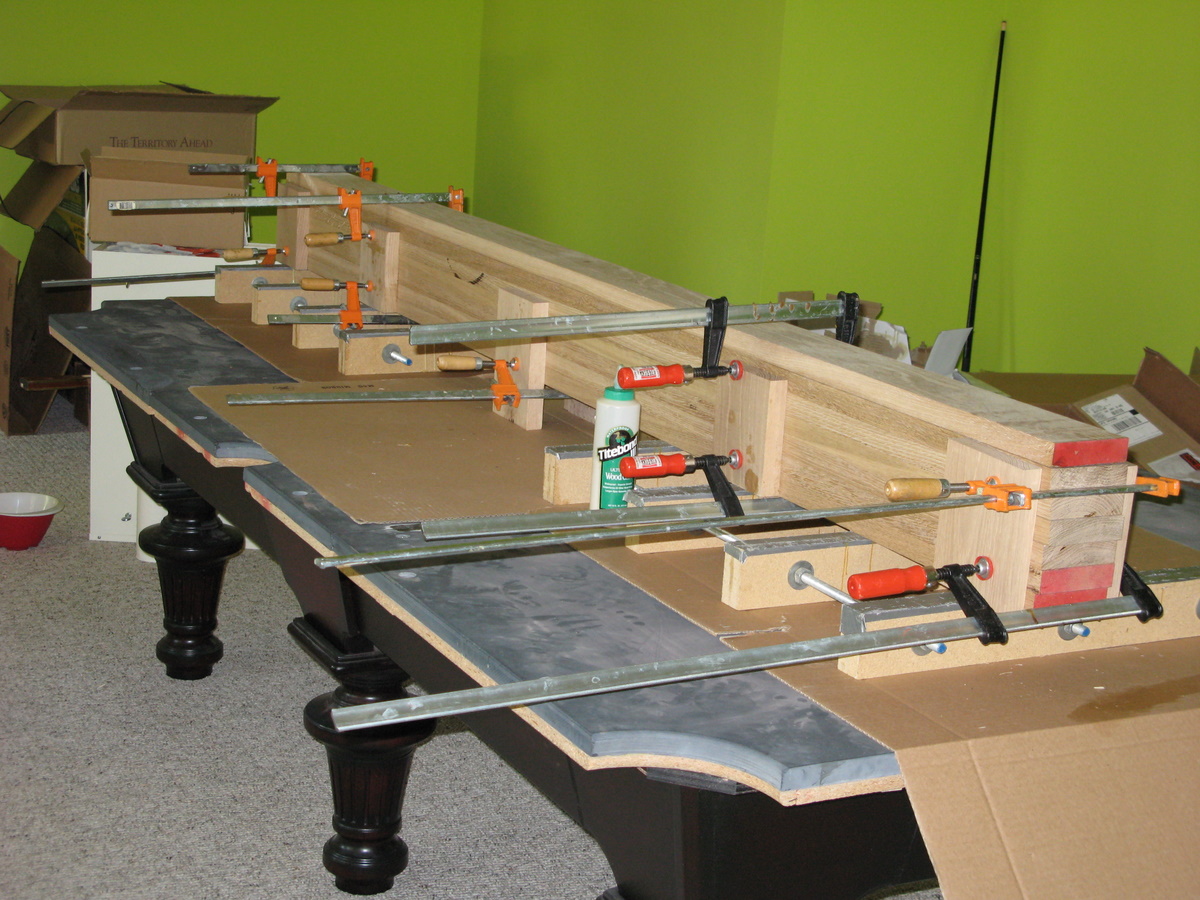
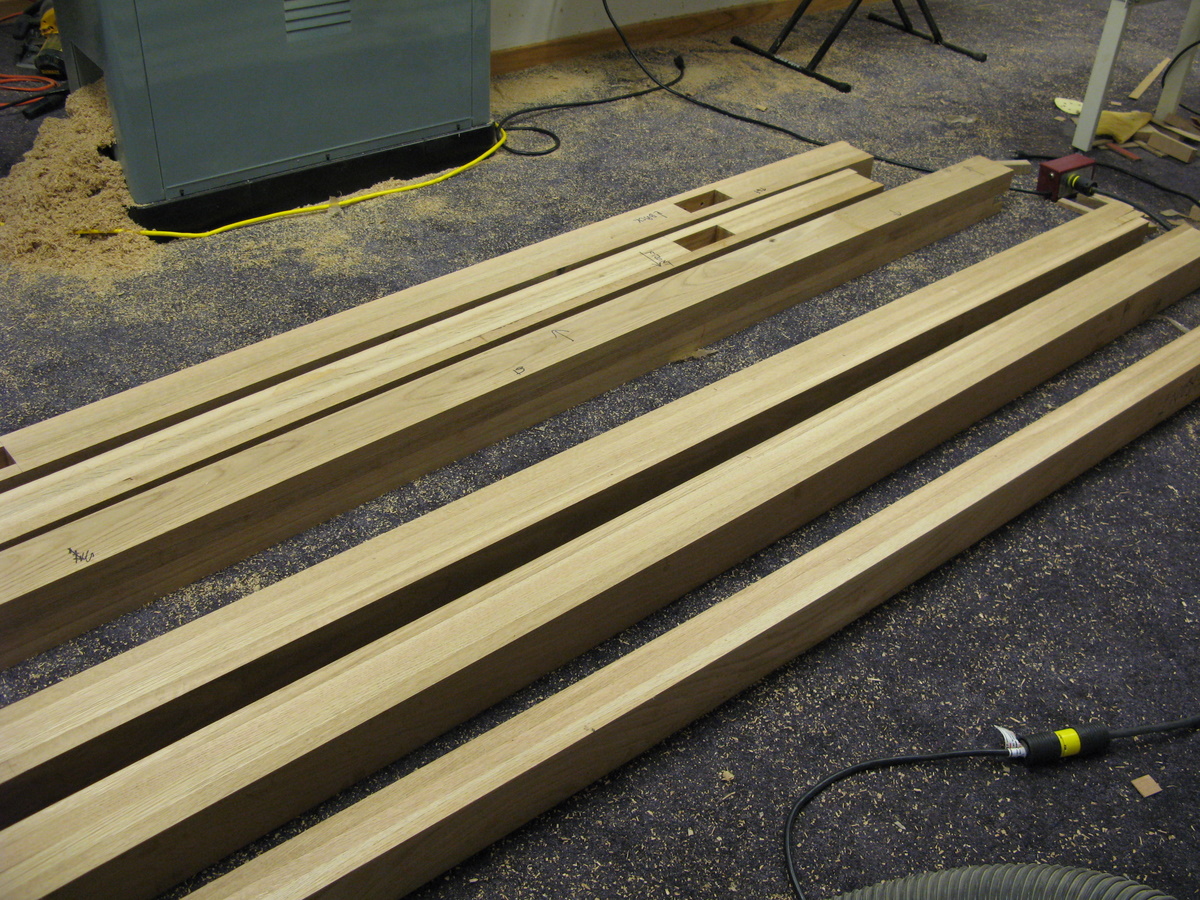
I had the shop S2S (surface two sides) the oak hoping to avoid doing a jointer/planer sequence with each 8 foot oak board (they are heavy) but here's a photo of the rough-sized wood for the benchtop really clamped pretty hard.
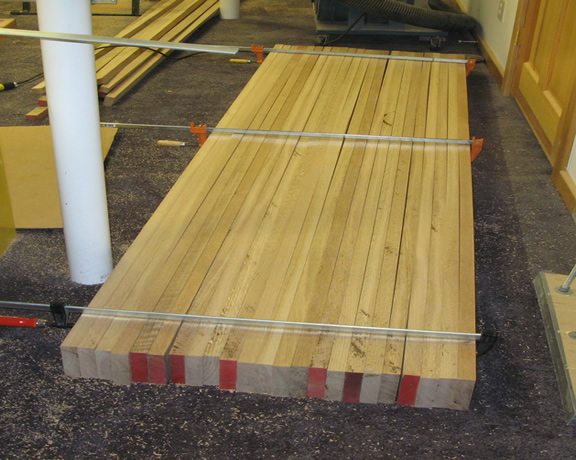
Even in this low-res photo you can see gaps so I ended up jointing and planing anyway. The S2S probably saved a little time and cost some thickness. I wouldn't do it again.
One final point on wood selection (which I'll hammer home later). Pine is really easy to hand-work. Oak is not.
Glue Selection
I used Titebond III glue. I really like working with yellow glue and the new III has a longer open time (10 minutes versus 5 for older Titebond). I still ran right up against the open time in a lot of the glue-ups. The bench used almost exactly a gallon of glue. I tend to use a lot of glue in laminating. Spots with no glue are bad, too much glue just dribbles out and can be chiselled off so I use too much much glue. For the tenon-mortise joints you need the right amount of glue.
Building the Workbench
Prepping the wood
The top is 8'x2'. I won't go through Chris' thought process as to size, but I agree with it. On my little yellow bench I usually clamp a benchtop (as above) and have tried all different sizes (well, never 8' long...).
I first took the 12' long sticks and cut them to 8.5' and 3.5' with a circular saw. The long ones were for the top, the short ones for the legs. I then edge jointed all the boards and marked the jointed side (big arrows on the planks pointing 'down'). I had 24 sticks to play with and they had a thickness of just over 1 1/8" so I was hoping to use the 3 leftovers for the stretchers. That didn't happen since I ended up jointing/planing all the planks (and a few ended up pretty thin).
The legs
The 3.5' boards were rough-dimensioned for the legs and jointed and planed.
I then almost final-dimensioned the boards. This would usually be done later but I wanted to cut the mortises ahead of time. That required correctly dimensioned lumber otherwise the mortise location and angle drift when you joint/plane the final block. The glued-up leg had two faces I could plane (the edge face without the mortise and the face-face of the two-board shoulder). The edge face with the mortise needed to be not-planed (since I didn't want to lose mortise depth nor skew it) and the face-face with the one-board shoulder needed to match the tabletop plank width so I didn't want to slim it.
Once the boards were all dimensioned I cut the 'freebie' mortises. These are mortises that I made by cutting the planks ahead of time and using the lamination to make the mortise. If the tenon is a board of exactly the same thickness I'm in business. The benchtop mortises are two planks think and the stretcher mortises are all 1 plank thick. Of course one set of mortises have to be hand-cut since the side stretchers are not parallel to the leg laminate.
I clamped 4 of the 8 leg-tenon boards together facewise and ran them through the tablesaw with the blade height set to 2 5/8 (2 1/2 for the mortise, and 1/8 for glue) to make two slots 3 inches apart. I then widened one slot by running the boards through a few times while inching the boards right (I don't have a dado blade..). After there was a 1 inch gap I then ran them individually through my bandsaw, creating a rectangular slice. When the wood is glued up, this produces a 'perfect' mortise one board-width thick. Now all four legs have exactly the same mortise. As you can see in the photo I did the same for the top.
Conventionally you would glue up the legs then joint/plane and tweak the tenon/shoulders. Instead I cut them exactly to size and then glued them up. During the glue-up I flushed the bottom very carefully and ensured the blocks were flat on the form. I messed up on the left-front (of course) and allowed one plank (not the tenon) to not rest flat. This caused trouble later but really good attention to detail in the leg glue up saves huge amounts of time by letting you build the mortise using saws.
The reason for cutting to size is to ensure the shoulders and tenons line up trivially and most importantly to guarantee that the final mortise that I 'cheated' is exactly parallel to the ground and not skewed left or right or up or down. Any twist or bow in the glue-up result would cause the mortise to twist in the final result whether you joint/plane or not.
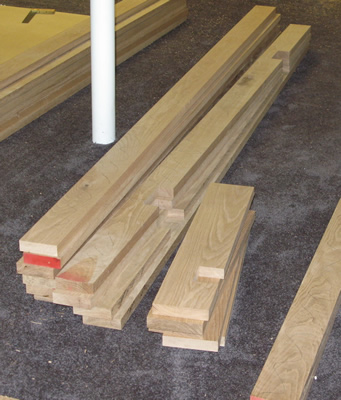
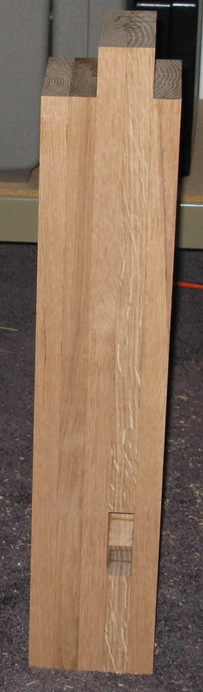
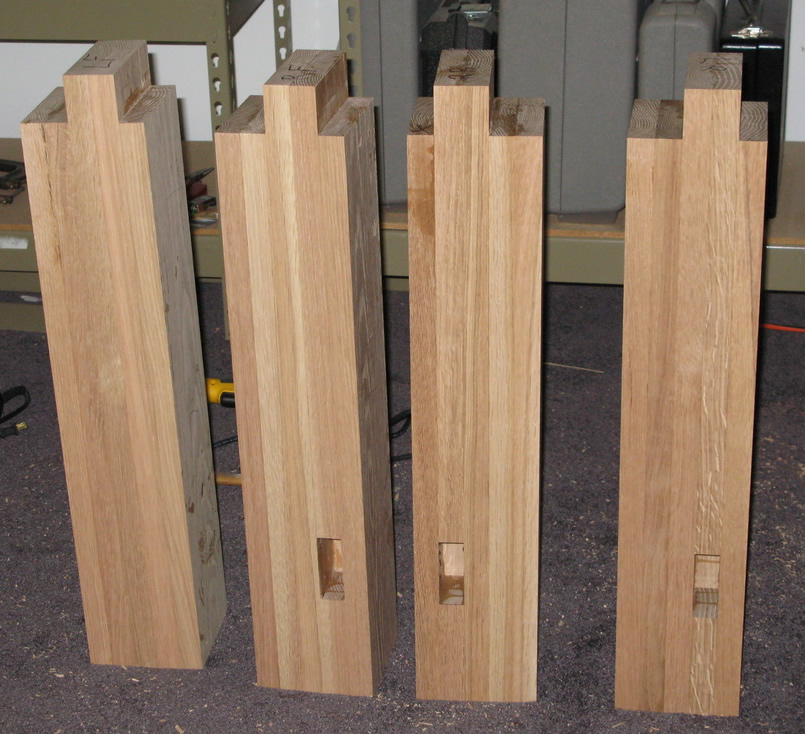
Here's a picture of the final legs.
The top
The top is massive. In Chris' book he recommends you face-laminate about 5 sticks of the tabletop at a time, then joint/route those blocks then glue them together. I have a larger jointer and could do 7x blocks, but couldn't carry them to save my life. I found by experimentation that 4 planks was about as many as I could carry and run through the jointer laminated together. I guess I'm a wuss.
The 8' boards were rough-dimensioned and jointed and planed (at which point I needed the 3 spare sticks since I had lost thickness). That sounds a lot easier than it was. Just ripping the boards through the contractor's saw was interesting. With one stick, the 2" strip that was ripped went boing and literally flew 4 feet through the air curling into a bow as it went.
Running four 8' boards clamped together through a tablesaw is almost impossible with one person. Thank goodnesss I had a friend to help push the ends of the boards while I pushed them through the tablesaw. That set up the mortises just like in the legs.
Now, I had two real dimensioning issues with the top.
- I had barely enough white oak. Once the individual boards were planed/jointed my top width had dropped to 24.5" and I had exactly one spare board which I was hoping to keep for emergencies (like a messed up stretcher).
- If the pre-built mortises were to work well I had to avoid any twist/bow in the blocks with the mortises in them, since any bow would reflect in the mortise position no matter what I did with the jointer later.
These two issues meant I needed a way to glue up and get the laminate blocks 'exactly' flat along their 8-foot face and I needed to get the edges with the mortises all in the same plane although not exact. (By exact I mean that slight errors won't work - a slight error being about 1/100"). To put this in perspective if we assume that I have a 1/8" bow in an 8' block that would cause an 5/96*1/8 or 1/160" skew in the mortise top to bottom.

Here's an exaggerated view of a 3-laminate bowed significantly. You can see the block width decreases and the mortise skews in the final jointed result.
Meanwhile I had another problem. Where could I find an 8' flat surface to do the glue-up, especially to those tolerances? If I had one I wouldn't need a workbench!
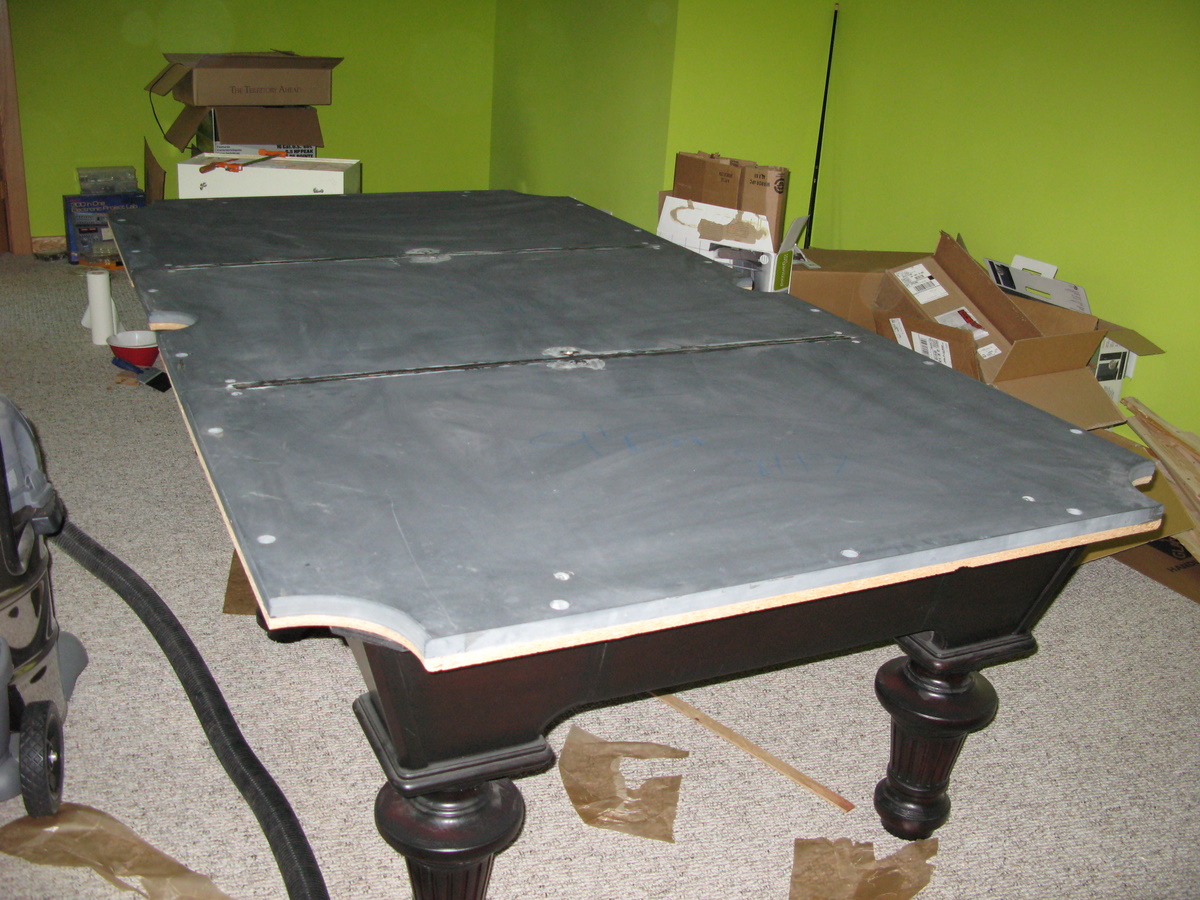
I finally found a solution (one you probably can't use). Since I'm moving I had a half-built pool table in the next room over and the granite was already on the top! I shimmed it pretty carefully and used my longest really flat ruler (1 meter) to try to get it flat. You would think you could just carefully joint an 8' board and use it as a ruler but it has too much flexibility. If I didn't have this table I would have gone out and bought the thickest 4x8 mdf sheet I could find and use that once I figured out how to get it home in my little car.
I then glued up the first block. One from the middle of the table (not front/back which have mortises in them).
Here's the first block being glued up. Note how I used the flat of the pool table for the face of the laminate, since that was most critical. When the glue dried I measured the block and it was bowed less than 1/8" in the middle - pretty good for a shimmed pool table.
I then jointed/planed the edge-sides of the block to get a flat 8' surface with lots of mass. All further blocks were glued up on the pool table as well, but using that first block as an edge-guide to ensure the block face was flat after glue-up. Here's a second glue-up. Note use of the first block as a face-guide. You can also see the front block glued-up with the pre-built 2-wide mortises. When I glued these up I carefully started with the center clamps and moved out to the ends to avoid putting unequal pressure on the clamped block.
To see how well this worked, when I clamped all the top boards together before glue-up the width was 24.5". I cut about 3/32" off the first block after planing and jointing. The final table width was 24 1/8" since none of the other blocks needed jointing or planing on their faces - and when I pressed the blocks together by hand there were no visible gaps (except in that first block pre-jointing).
To test the mortises in the top, I built a test tenon exactly the same as the tenons on the legs. Here are two photos showing the mortise/tenon fit after gluing up the top.
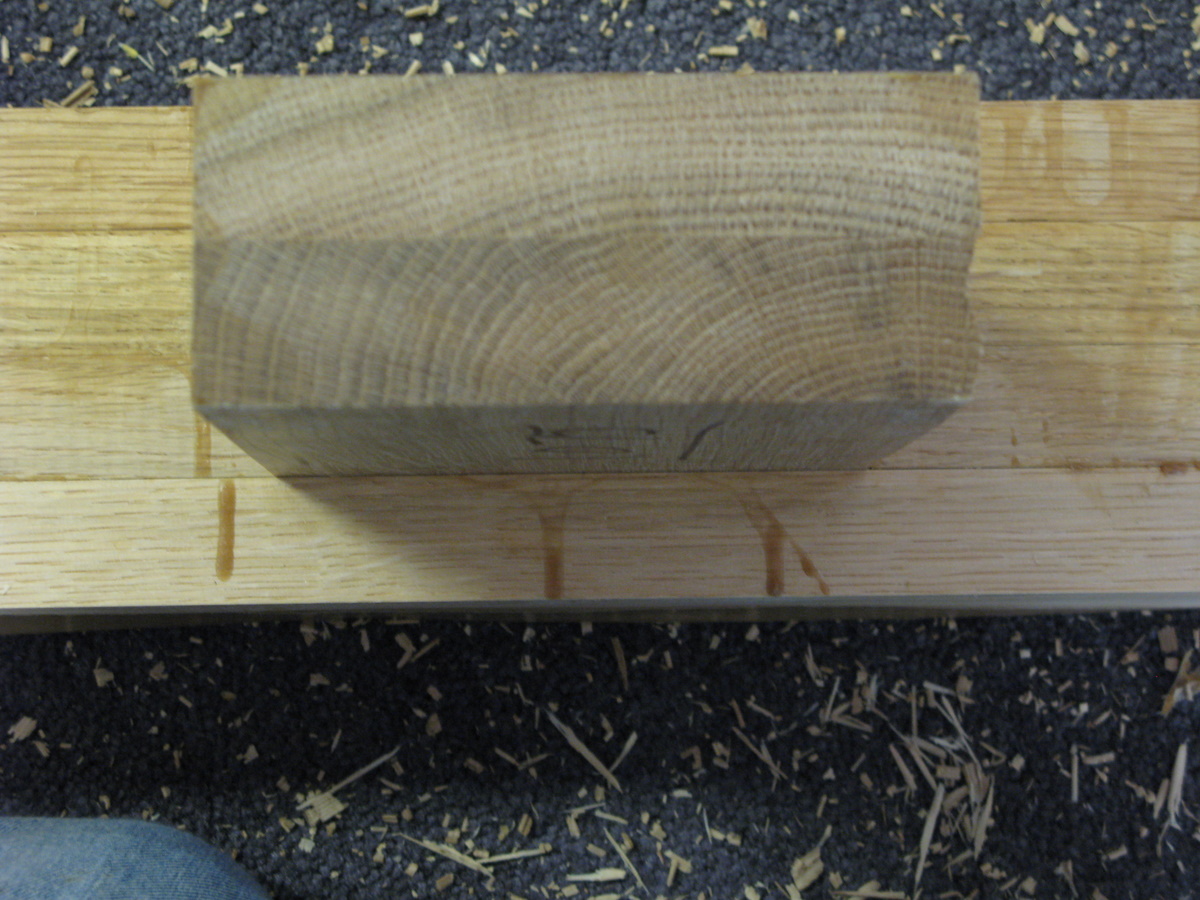
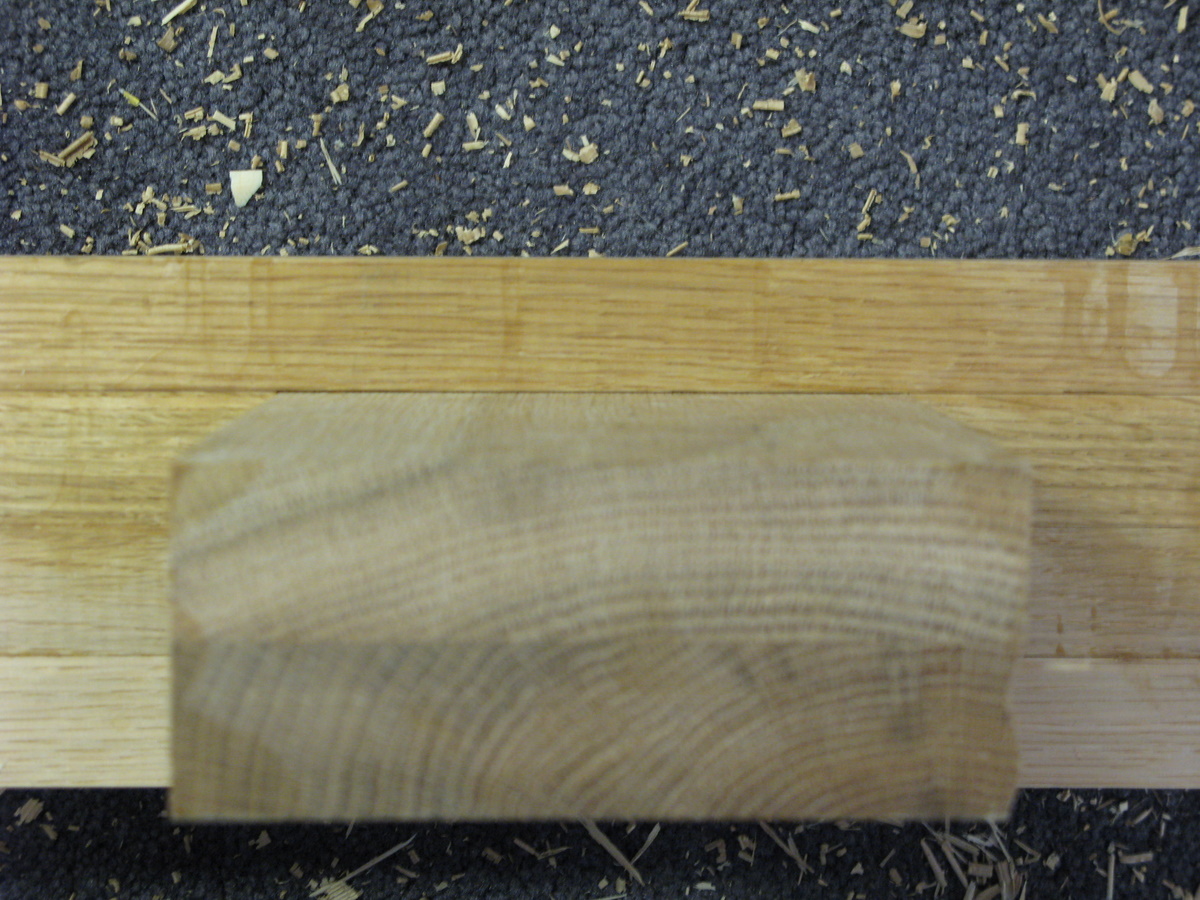
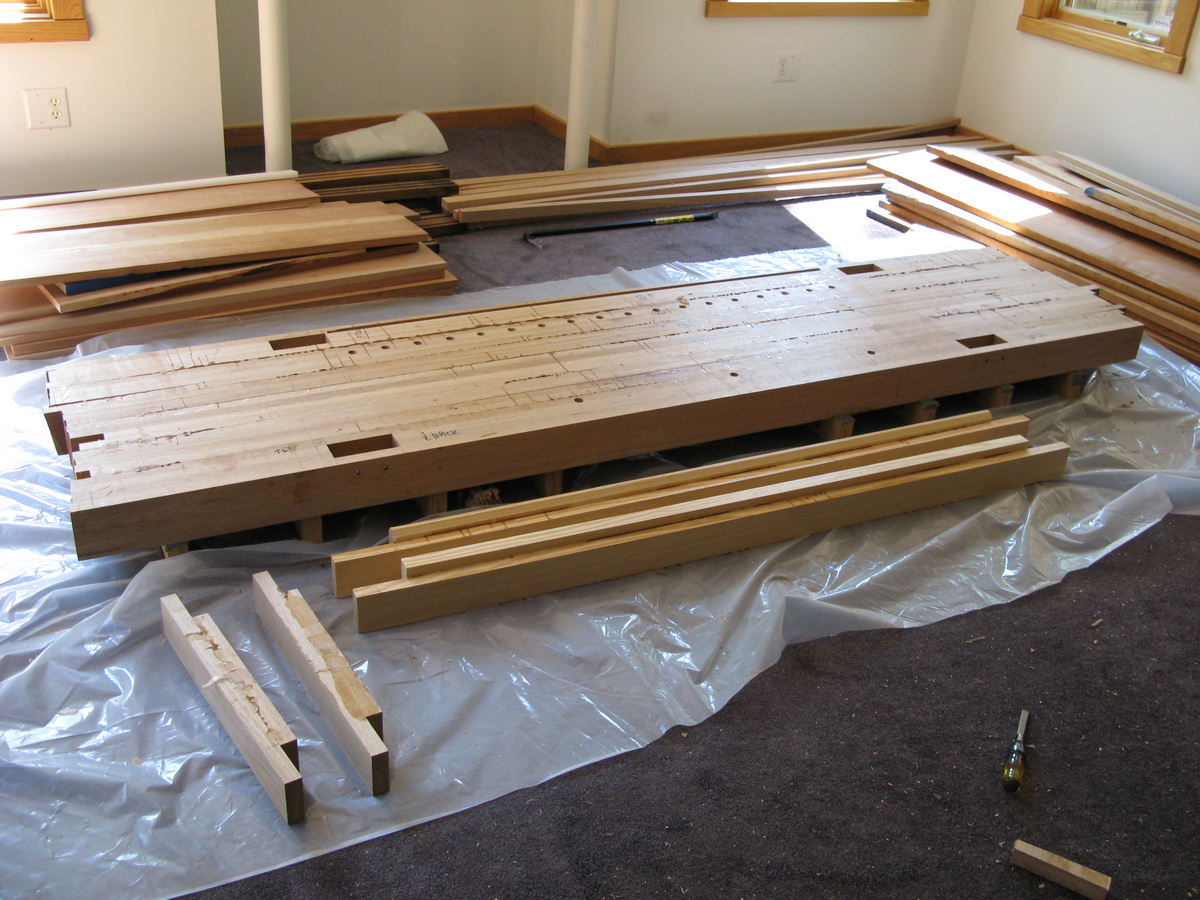
Here's a picture of the final 'blocks'.
Hand work
So, Chris does a fair amount of hand-work to build this table. Since I 'cheated' on 8 of the mortises I only had 4 to chop by hand. I also had to chop the 1/2" slot for the deadman ruler. That doesn't count whatever shoulder or tenon trimming I had to do. That also left the holes to be drilled for the pegs (two in each tenon).
Here's where my 'amateur' machinery fell down. My mortise machine couldn't mortise a 4" tall object so I had to disassemble the base. My drill couldn't drill a 4" object so I had to remove the base there, too. It also only had a 2" deep hole it could drill and I needed 3-5" holes.
I used the drill press to start the holes and finished them by hand. Unfortunately I used a 3/8" speed-bore bit which was awful. As I found later (sigh) it couldn't drill a straight hole no-how. It just dragged the bit randomly through the wood which caused problems with the pegging.
The Mortises
As for the mortises. I had chopped mortises in cherry a couple of weeks ago easily. Chopping in oak failed miserably (the machine got about 1/10" and just stopped). So I had to make the mortises using a drill bit and then chiselling out the waste. This was a long painful task. I finally used the mortiser as a drill press (since my drill press was so useless) and drilled as much as possible and then used the mortiser with no drill (just a mortise chisel) and nibbled the hole as much as possible, leaving the chisel for large waste areas.
Each mortise took about 2 hours!
After doing the mortises I then did the slit in the front left leg. This slit is 1/2" wide and 4" tall and goes through the bottom of the leg. Chris recommends you bandsaw two parallel cuts then chisel the center waste. He comments this is 'fun'. Three hours later it wasn't much fun at all. Gosh I wish I'd used pine then. First I tried to chisel on the cut-line and after pounding a number of times I had removed a tiny slice so I decided to drill a hole throuugh the slice. My speed-bore promptly went running all over the place and froze in the gap between the bandsaw cut and the leg so I had to chisel the bit out first! The slit ended up taking about 3 hours to cut.
I'd prefer to forget this entire portion of the task.
The Stretchers
I left the stretchers for last. Usually you use the tenons to create the mortises but here the mortises were pre-built so the tenons needed to be sized to fit. Also, I couldn't know the side stretcher lengths until the table was fully glued up (since each block might have need to be jointed/planed the width of the table was indeterminate until glue-up. I also was able to carefully measure the front/back stretcher sizes.
I first used the plane to get tenon thickness right (matching plank depths), and then I dimensioned the stretchers slightly large and used the planer to get height right. As epxected I ran out of white oak for the front/rear stretchers and went out and bought 2x10x12 yellow pine boards for the stretchers. I don't know where Chris gets his SYP (or he's better than I am at picking the wood). I finally found a board that was moderately flat without too many knots but it was checked down the middle. I jointed both edges and ripped the board in half (twice) using one side for the tenons and one side for the other stretcher plank.
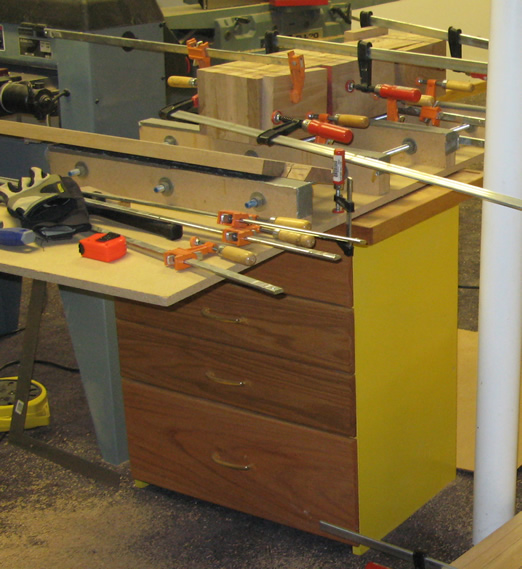
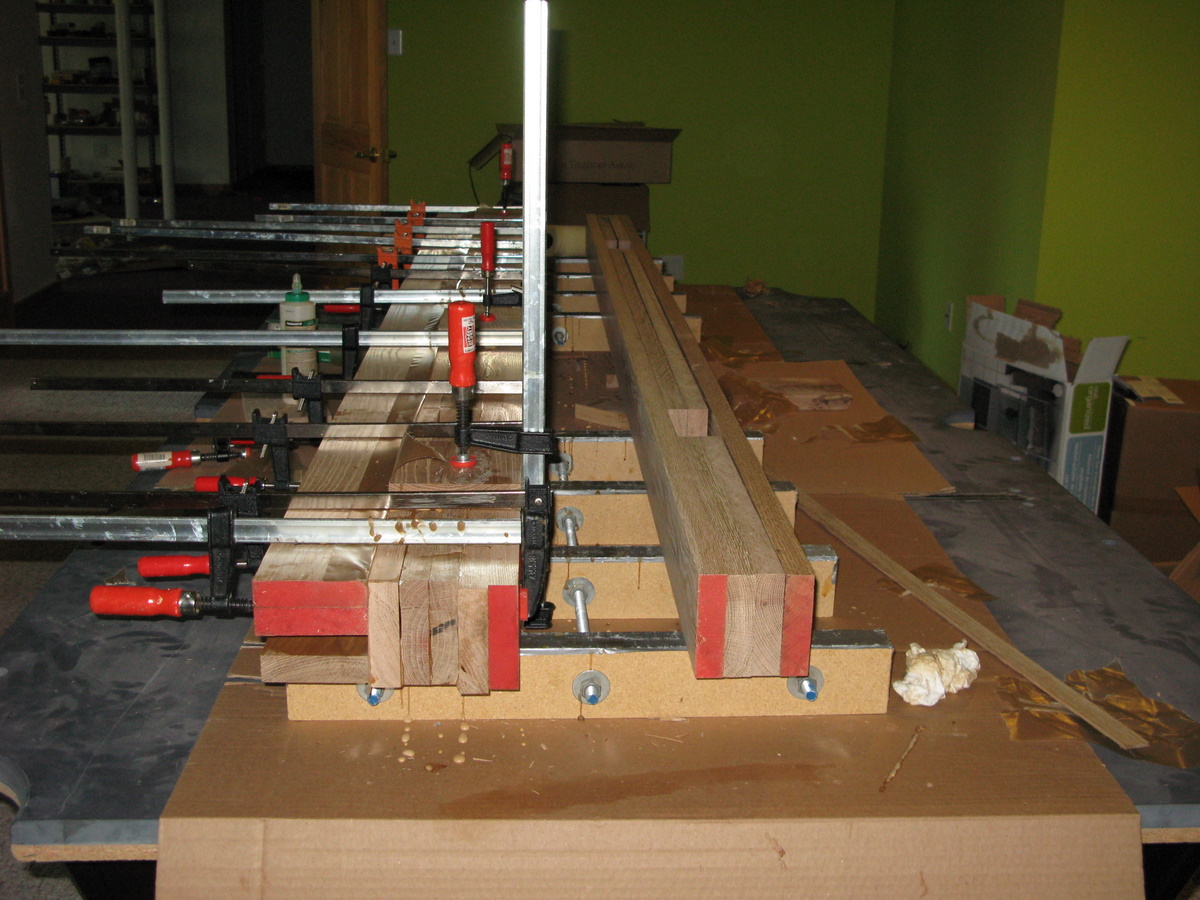
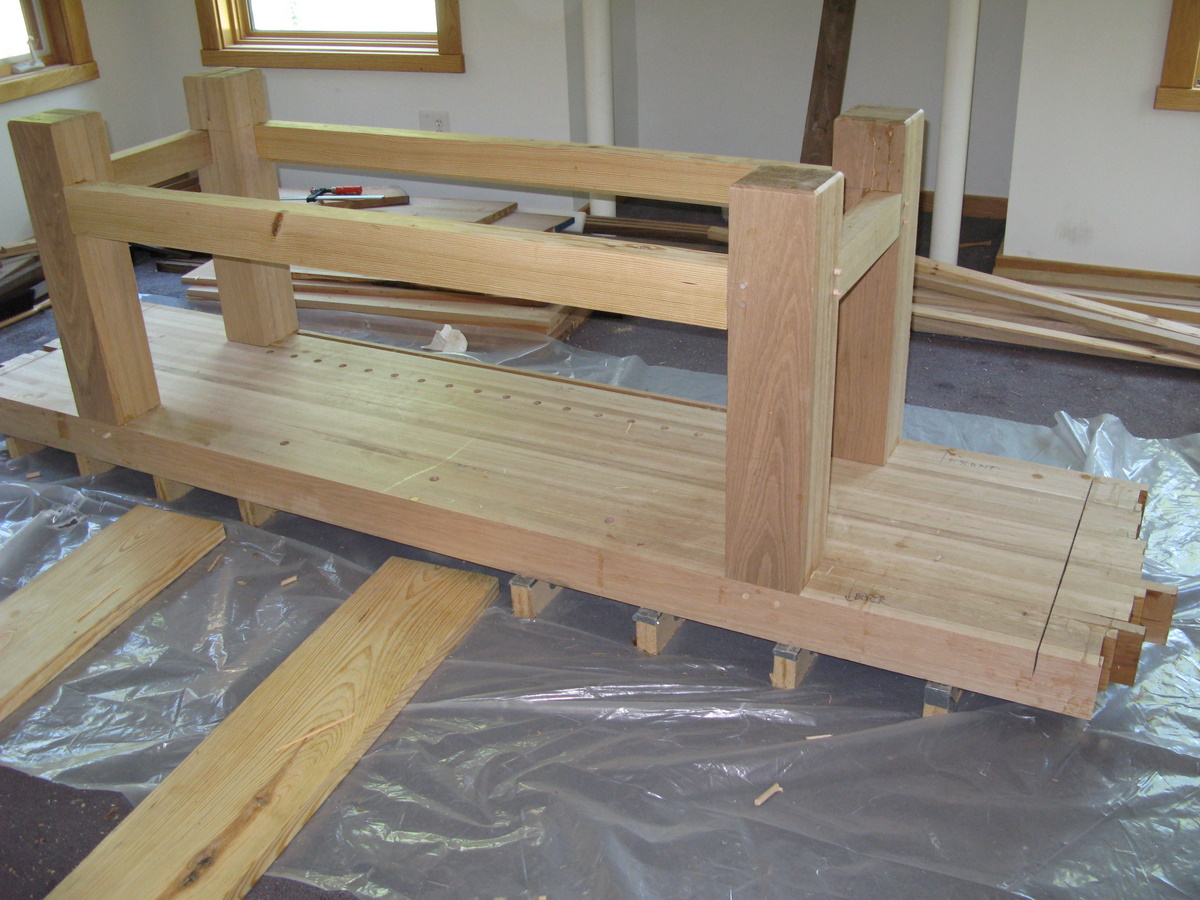
Here's a shot of the glued-up top and the stretchers. That mess on the left stretcher is left-over wax paper from the glue-up. I used a lot of wax paper during the glue-ups. Since most of my blocks were 5" I bought a roll of wax paper (11" wide) and sliced it in half before using it.
Notice also that the top is glued up on my floor. The top weighs about 250 lbs and I knew I wouldn't be able to get it off a real table top (and it might have collapsed my precious pool table) so I glued it up where it would end up.
Final Dry Fit
This was tricky. I dry-fit all of the stretchers in the legs and drilled the peg holes with the stretchers clamped in place (and I have no 5'-long clamps so this was interesting). Here's where precision in construction really helps. When the stretchers were clamped in the legs were very straight so the clamp/drill worked well. Chris says to drawbore the pegs (drill the peg holes in the tenons off-axis to tighten the joint). I wasn't convinced oak would drawbore as well as pine (getting smarter as the project proceeded) so I didn't drawbore, I just pegged at the clamp position.
I agonized over whether to dry-fit the table legs into the table. I had messed up the stretcher tenons thinking I could slice a tiny bit of wood using my jointer and the slice was much larger than I expected (1/16" instead of 100") so I produced one stretcher tenon that was noticeably too loose (oops). The leg tenons should have fit exactly into the leg mortises because they were built using planks. Shoulder fit was another matter...
I finally decided to dry-fit the legs. The leg I had been trying didn't really fit (it squeaked when I tried to put it in the hole) and wouldn't go without about 100 lbs of hammering. So, to size the tenon I clamped my belt sander to my table-saw top and lightly pressed the tenon to the running sander belt. It worked pretty well and the tenon was just the tiniest bit loose. Better yet, the fit was tight because some glue had run into the mortise in the top and reduced the mortise width a tiny bit. The other three mortises (which were cleaner) fit perfectly with no tenon sizing (see the photo above where I show the mortise fit).
Once the legs were in I did the same hand-drill the peg holes using the speed-bore bit. Oops. When I pulled the legs I found random holes in the inner mortise wall. The hole from outer wall to tenon was sorta ok but...
Final glue up
I then did the final glue up after taking a long breath. I put the stretchers in the legs and then flipped the legs/stretchers so they pointed down into the table top and pushed them into the mortises in the top. Gluing was difficult because I didn't want glue on the tenon tops but the tenons were pointing upwards for the glue-up. After gunking glue on the first tenon and some of the second I switched to using a paintbrush like a rag. I put glue on the brush then brushed onto the tenons - which went well. I didn't really need much (if any) glue on the leg tenons since they were such a great fit.
I built pegs from oak dowels. I cut the dowels to size then used my disc sander to make them look like little pencils (sharpening the top). Interestingly I bought 4 3/8" dowels from Woodcraft and found that (a) one of the dowels was less than 3/8" and fit looselely in the peg holes and (b) the price tag they use has so much glue on it you can't get it off the dowel and use that portion - so you waste about 4" of each dowel.
After everything fit together I put the pegs in and then tried to hammer them fully in. Another oops. That was hard. I have this little dead-blow mallet that I beat the heck out of and couldn't get the pegs in. I finally took a long pine board and swung it like a baseball bat at the pegs. This lasted two blows before the board split. So I switched to a heavy oak board and did the same. Pretty easy to totally smash your hand on the side of the bench. It also took some precision with the board. I managed to get all the leg/stretcher pegs in beautifully by whaling with the oak board on the pegs. The leg-top pegs didn't go as well (partly thanks to the drill bit wandering everywhere). Half of the top oak pegs went in correctly. Half went in partially and then the peg snapped off when I hit it wrong. So be it...
Next time I buy one of those massive wooden mallets and use a non-speed-bore bit.
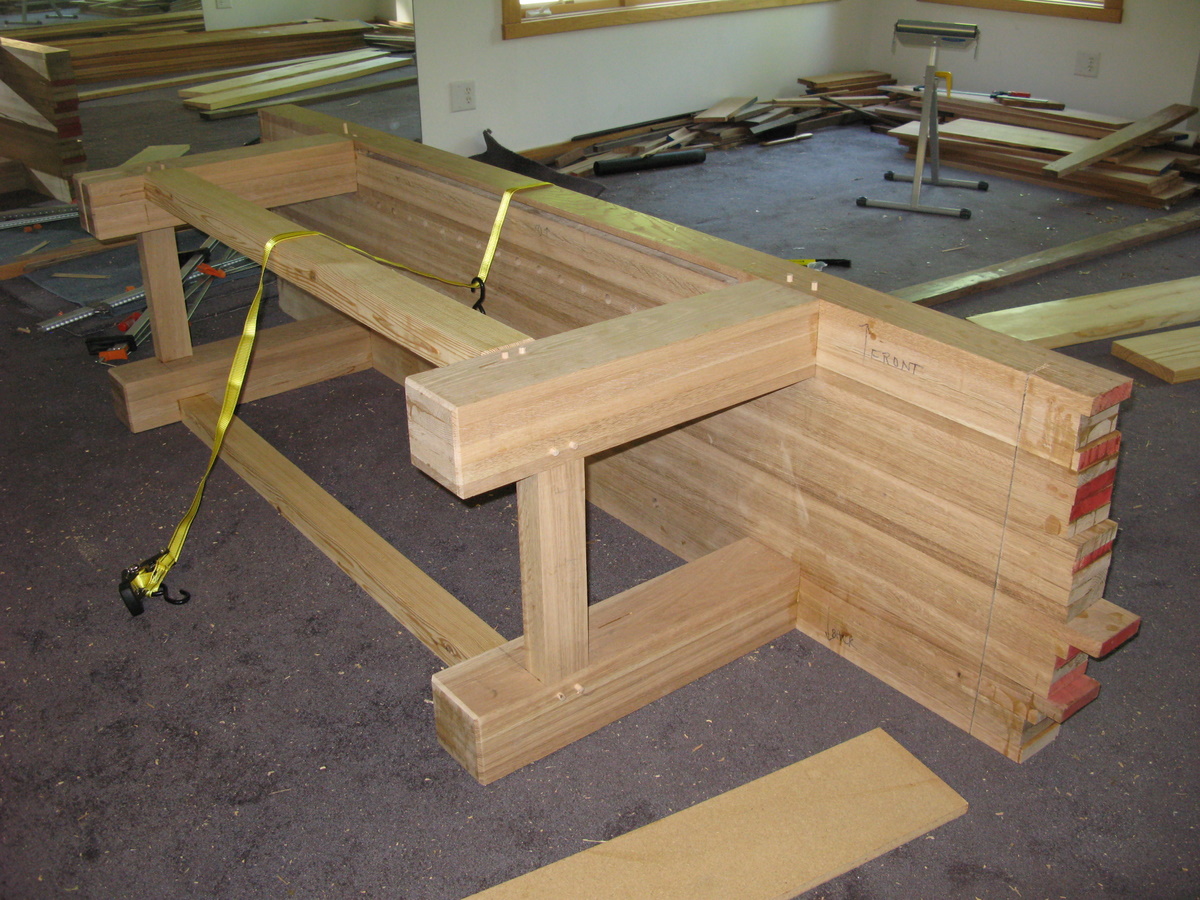
Here you can see the final glue-up. Note the pegs on the stretchers look good (about 1/2" sticking out - which is perfect). You can also see I broke two of the top-leg dowels since they're flush (ahem).
Of course I'm running frantically around at this point, getting everything together before the glue sets. I wanted to set the bench on its legs here so I could pound on the benchtop and get the leg shoulder flush with the benchtop. Those two long pine boards are so that when I flip the bench there is a gap to fit my lever (board) under.
I put a 6' board in the center gap under the table (like those pine boards but under the table) and levered the table on its side. Then as the glue was drying I cursed and pushed and pulled and couldn't get the table on its legs all by myself. I'd put a board under it, lever the board up and watch the bench slide across the room while I was carrying 150lbs or so. I finally gave up, called my brother in law and had him agree to come over and help after work - sigh - during which I watched my glue dry as the table lay cocked up at an angle... arg. Thank goodness for the pegs or it would have been a disaster. Instead some glue filled the space above a leg shoulder or two and the legs were not as flush at the top as I would have liked. Have someone around for this step or don't bother trying to flip it. I wish I'd spent that time aligning the legs perpendicular although I'm not sure with the pegs it would have mattered much.
Here you can see my feeble attempt to winch the legs and boards attempting to be used as levers. Here's where it stayed for 3 hours.
When my brother-in-law showed up we just grabbed an end each and pulled it upright. Took 15 seconds. But of course, the glue had long since dried. I measured the legs and the error was well within acceptable and it feels like a rock.
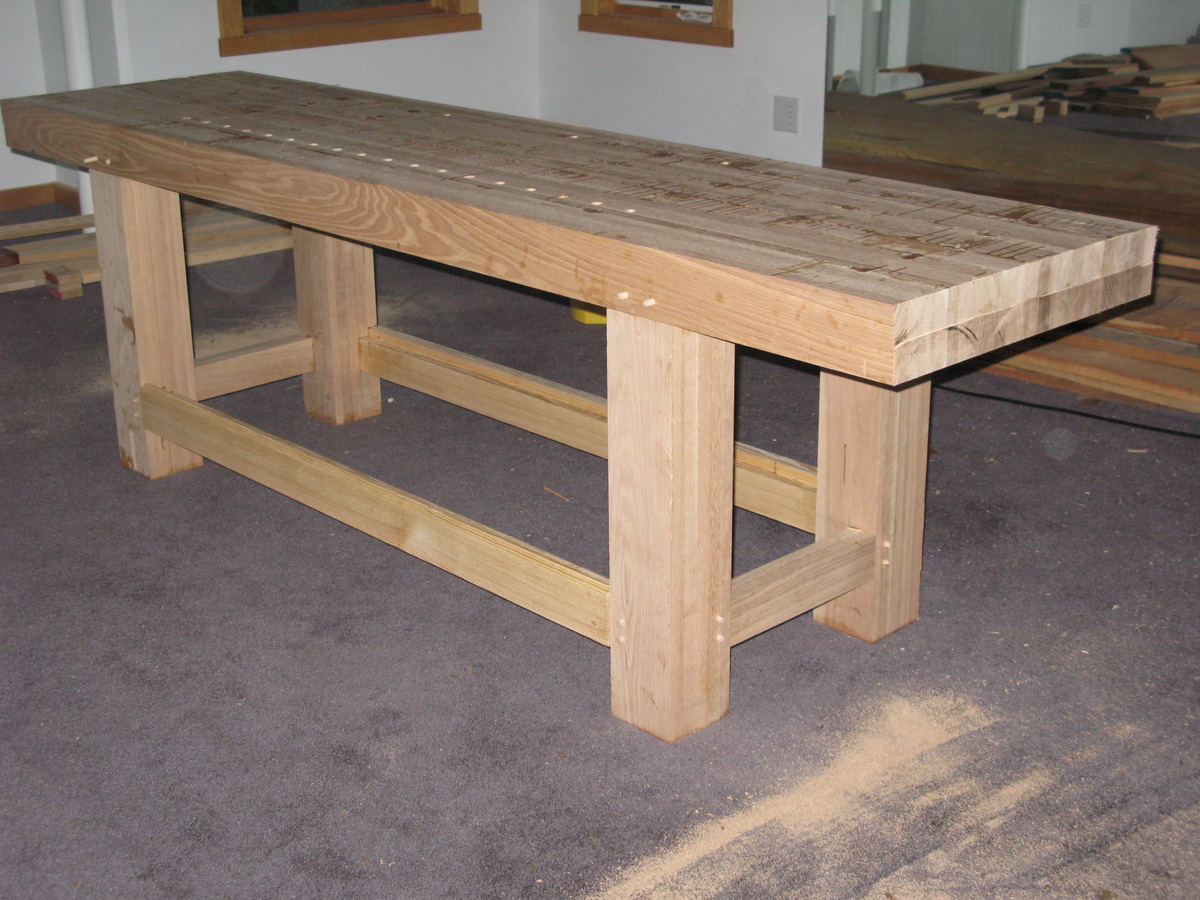
Final pictures
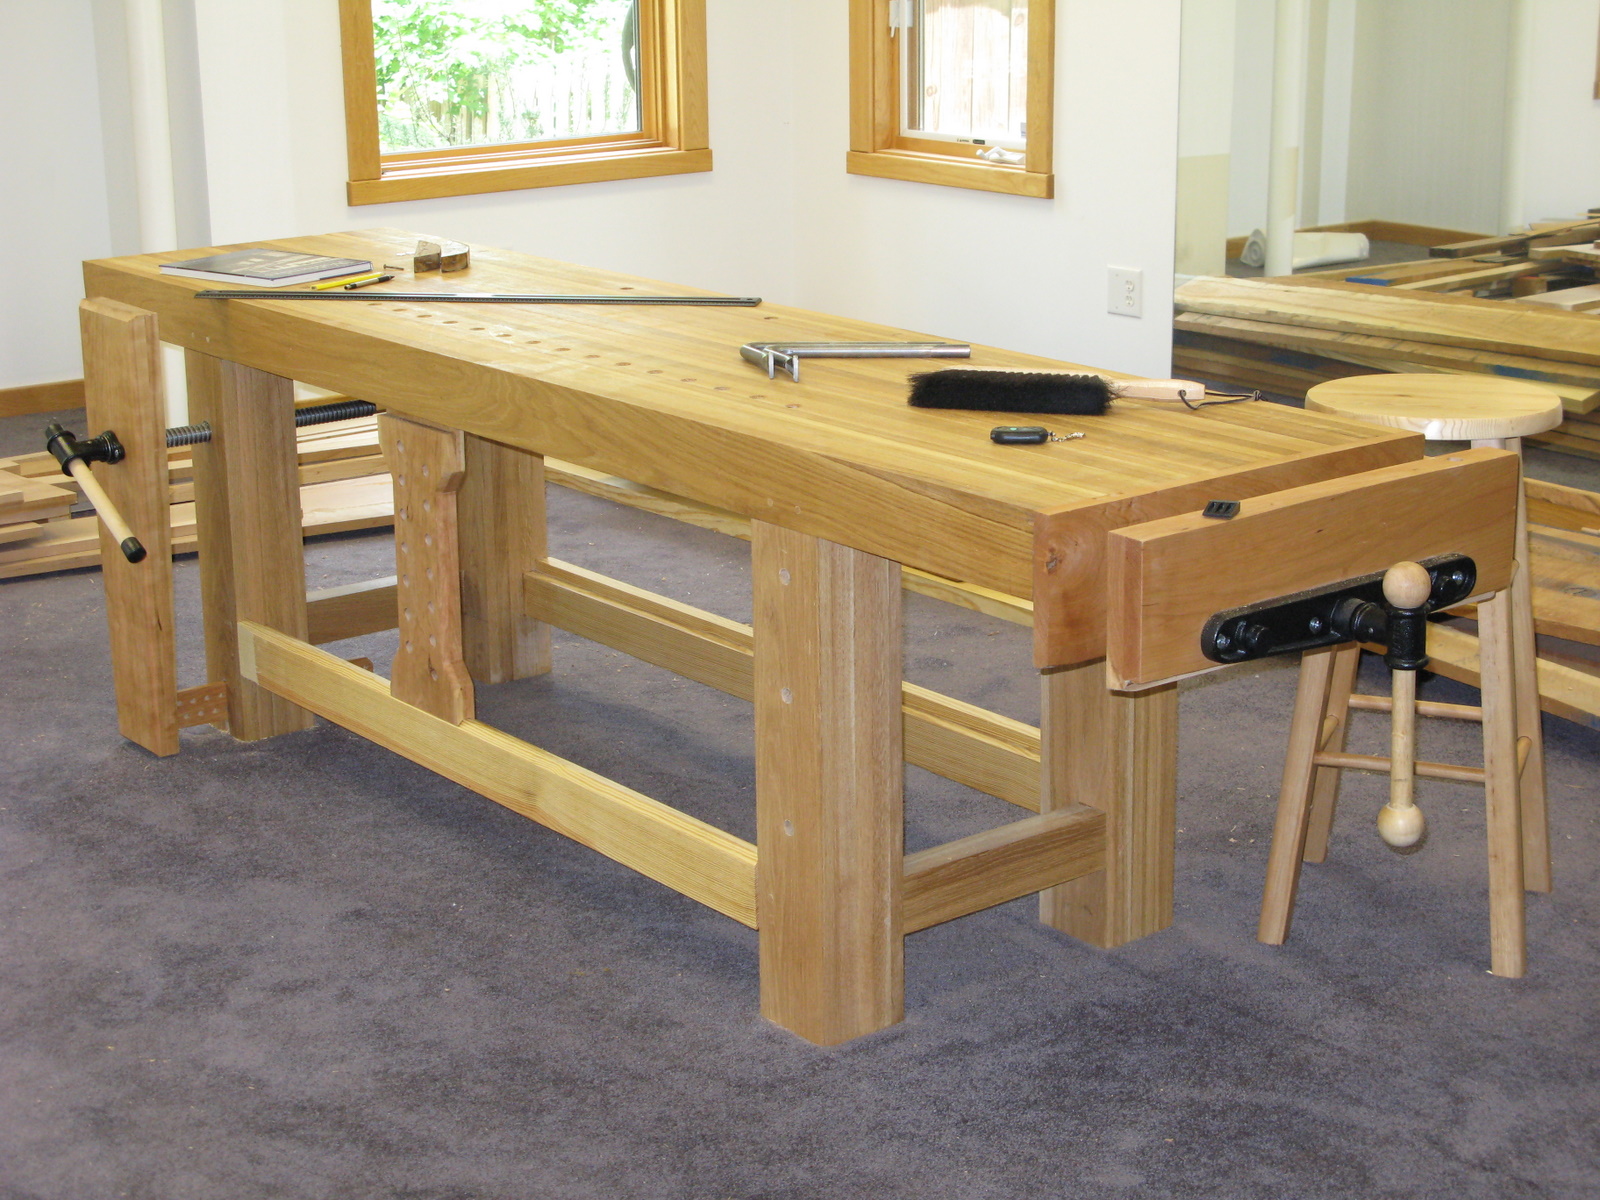
I haven't chiselled the glue off the top yet, nor have I installed the vise(s) or deadman, but here is a nice view of the table. Total elapsed time: about 10 days, maybe 70 hours.
Here's a couple of views of the bench without glue and with the end vise attached.
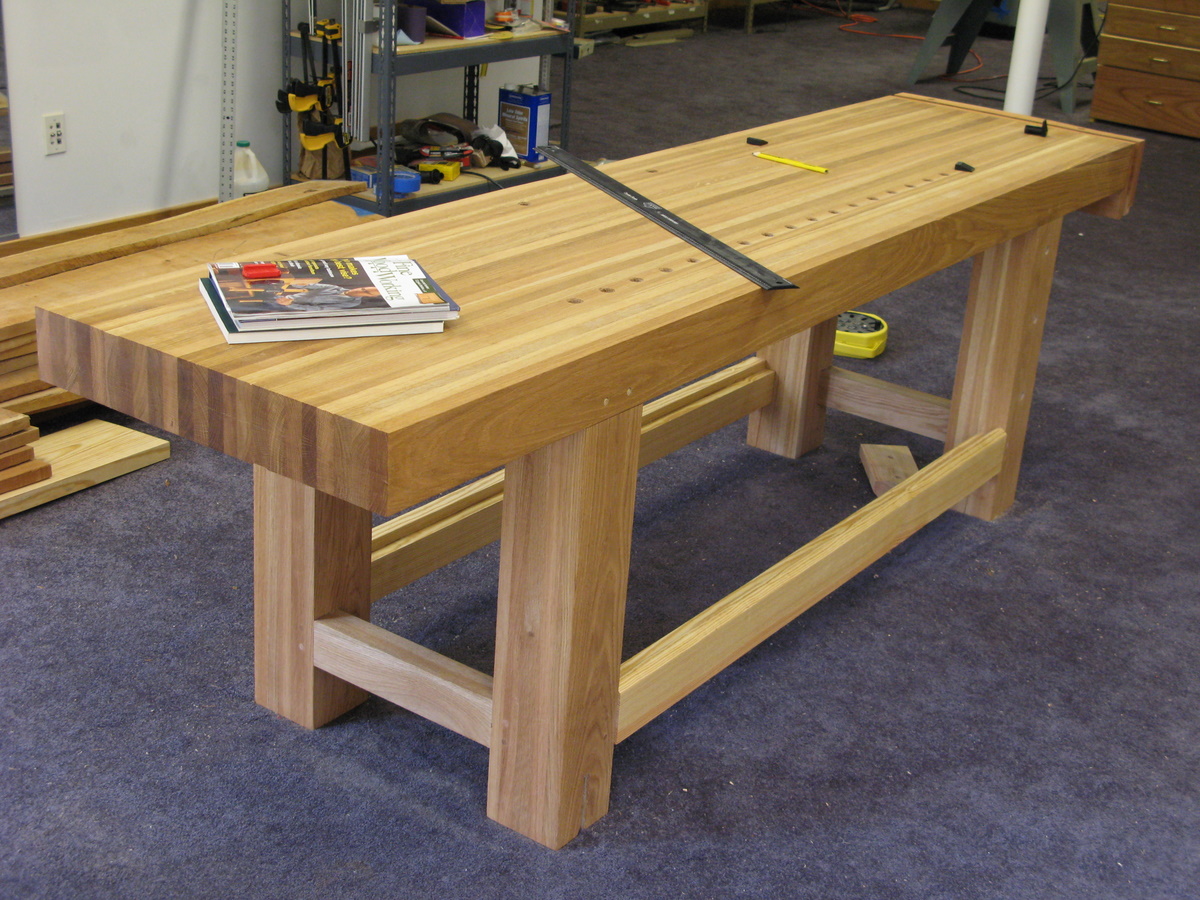
Front view from left

Rear view of end vise. It's a Rockler large vise. Installation was tough given the sparse documentation.
Here's a near-final view.