Side Tables
Dec 2010
After almost three years we finally have some furniture in the living room and I decided to build some side tables.
I built four of them, assuming repetition would reduce the average time per table and that was totally true. I'll bet it took me twice as long to do 4 times as many tables - since setup eats up so much of the time.
Anyway, the first one looks like this (click for the large image). Over the next few months these will darken substantially from the sunlight in that room. The legs will almost match the color of the couch wood!
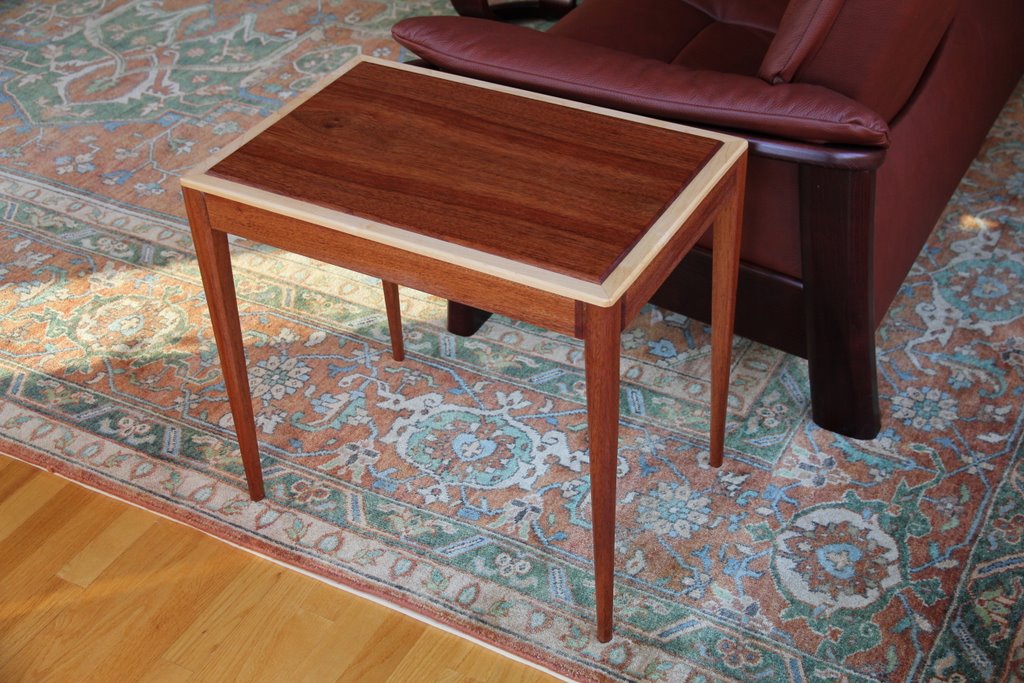
We decided we didn't like the lip - too dangerous with my kids. So, the next 3 I made the top flush by rabetting it about 3/4". I also reduced the grap between the rail-leg. It was attractive but I thought a narrower gap would look nicer.
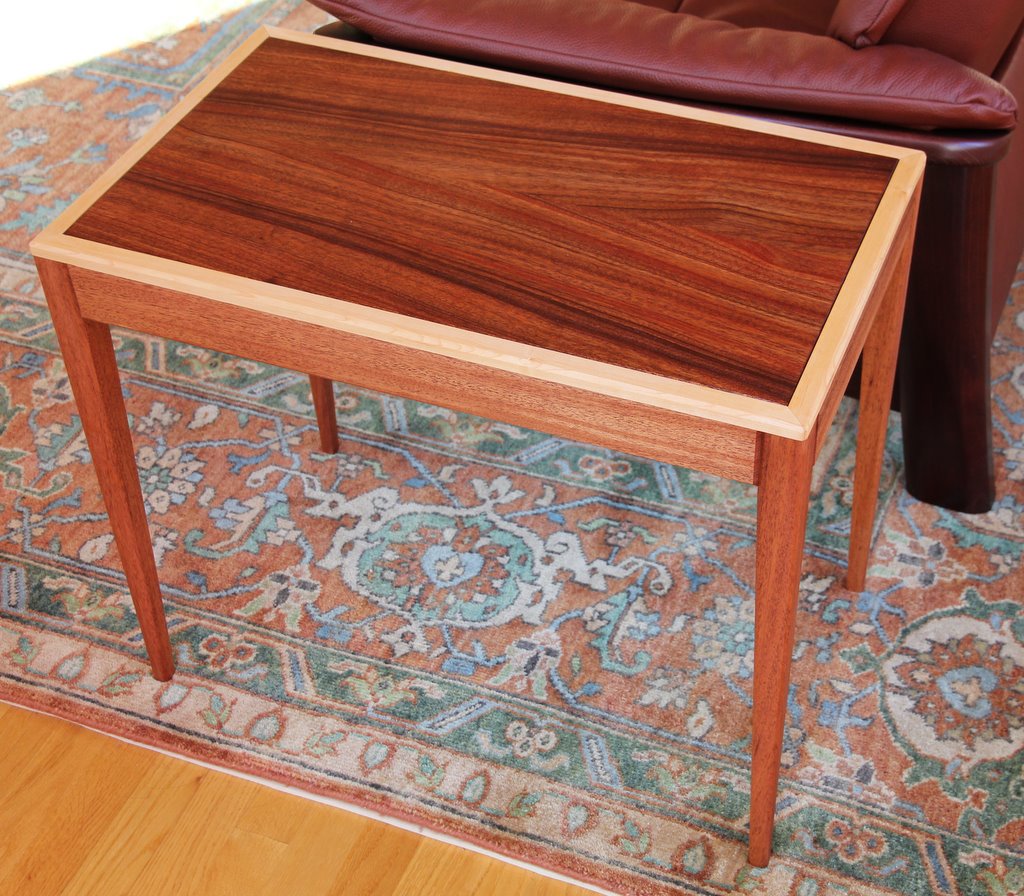
Imho here's the prettiest of the bunch.
Here's a view of all of them.
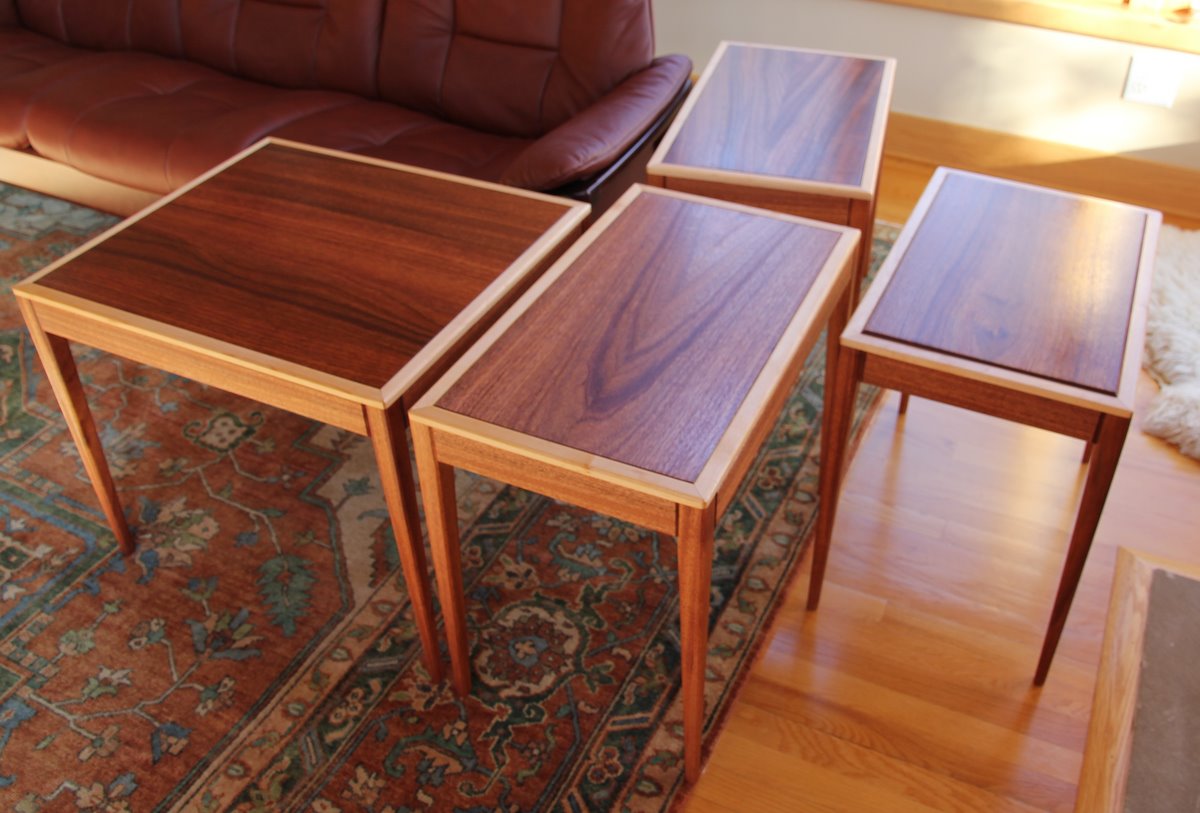
They're made out of solid mahogany. The legs are about 1.4" square on top and the tops are 14x24 or 21x24 (the leftmost). On each top along the rails there's a mitred strip of 1/2" hard maple to provide some contrasting color and hide the sidegrain/joins. The strip is glued securely to the rails but not to the legs. All of the tops are bookmatched - I slice down the center of a piece of mahogany, so a 1.5"x10"x2' becomes two .7"x10"x2' and fold it open (or closed) to produce a cool symmetric grain on top. The large table top (far left) is a bookmatched piece and something I thought matched well from the same board.
All of the rails are mortise and tenoned with my FMT - what a great machine. I wanted the longest possible tenons but they meet in the center of the legs so I cut both tenon tips at 45 degrees. I put 1.5x1.5x1.5 glue blocks at the corners for additional strength.
The tops just drop in (they're not actually attached to anything). The first set of maple strips I did by fitting the strips to the top, repeatedly cutting tiny slices off the strip ends with my Delta power miter saw (lol). The second set of strips I tried slicing them in pairs but still sized them to fit the top (less duh). The 3-4 set of strips I made the strips as pairs a tiny bit small (with one cut at each end) and glued them down then used my jointer to slim the tops to perpendicular and fit (finally!).
I sanded the tables down uniformly to 220 grit (time consuming) then oiled them with tung oil. After that I sprayed on about 3-5 coats of shellac. I then sanded lightly with 320 grit and recoated with shellac.
The tops started with 2-3 coats of tung oil. Then, after 3-4 coats of shellac I sanded them flat with 320 grit sandpaper then put two more coats on. Then I rubbed them with black nylon steel-wool substitute and a slurry of pumice and mineral oil. After wiping it off and letting it dry I sprayed another couple of coats of shellac. The tops are really nice...