My LED Lamp
Feb 2010
I hate replacing light bulbs. I have tall ceilings which means I need to go get a ladder and replace a bulb then put the ladder back. Some of the lights I'm not sure how to replace...

So, I long ago decided to switch to LEDs when the time was right. I'm still uncertain about those commercial non-dimmable LED bulbs. The web scuttlebutt is that a lot of them don't have the life you'd expect and often not the brightness. Looking around for LED table lamps, they all look techie and steel.
I decided, therefore, to do an LED lamp. It was a pretty easy project but I built it totally from scratch (LEDs and wood).
The Wood Base
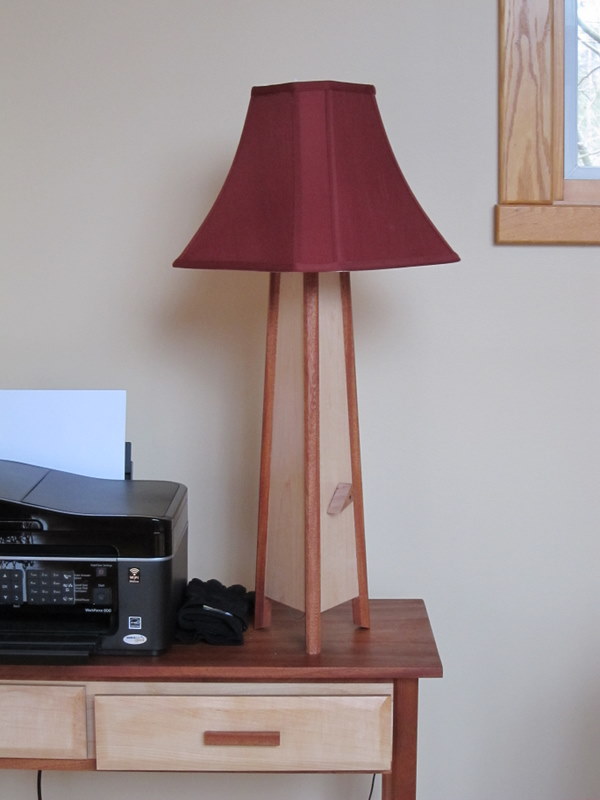
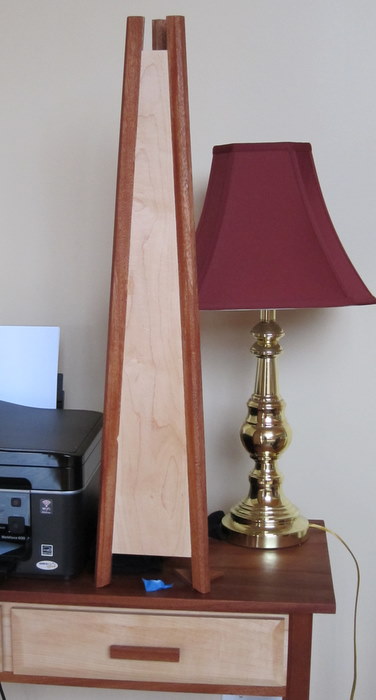
I found LEDs that had enough coverage (120degrees) and lumens such that 3 of them would be about a 35W lamp, so I decided to build a triangular base. Since the table it will sit on is mahogany and maple (see here) I used the same kind of design for the base. Here's a photo. I used a poly for the maple and tung oil for the mahogany - leaving the maple really clear and the mahogany deeper than this photo shows.
I used a 3/4" mahogany piece to create the legs. To produce each leg (with 5 sides) I trimmed twice on my bandsaw at 30 degrees, producing the two triangular faces. Next, I routed a 1/4" wide x 3/16" deep dado in those two triangular faces. I could then trim to 3/4" depth. Finally, I ran them twice through the router with a 45 degree bit to produce the half-hexagonal front.
The sides are 1/4" hard maple sheets I made by resawing a thicker piece of maple. I then ran them through the tablesaw at an angle (twice) to create the triangular maple sheet. They attach to the legs at the dados - a pretty simple joint but this thing shouldn't take much abuse. It's still a very long glue joint with all the grain lined up right and easy wood flexing - it shouldn't detach.
The LEDs
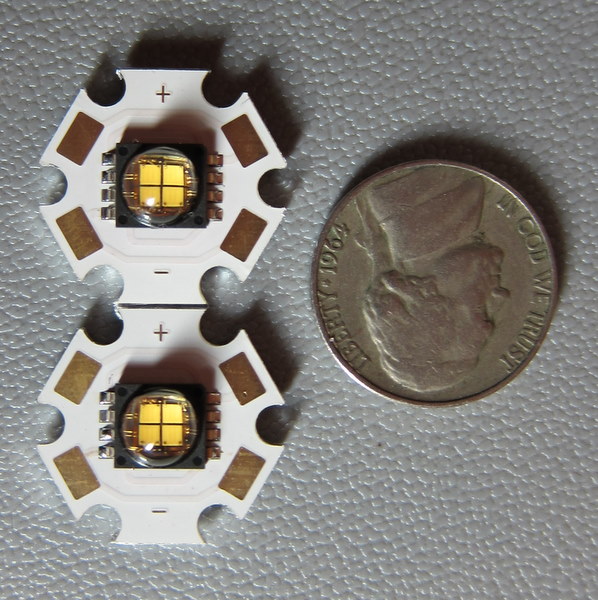
For LEDs I used the CREE MC-E star LEDs. These are monsters rated at about 5 W and 320 lumens (natural white). Mounting them is not that easy since they need a heatsink but I found some at Mouser that look a bit like a lamp base but have a screw in socket so the LED is replaceable if something messes up or it dies.
Here are some pictures of the LEDs and mounting.
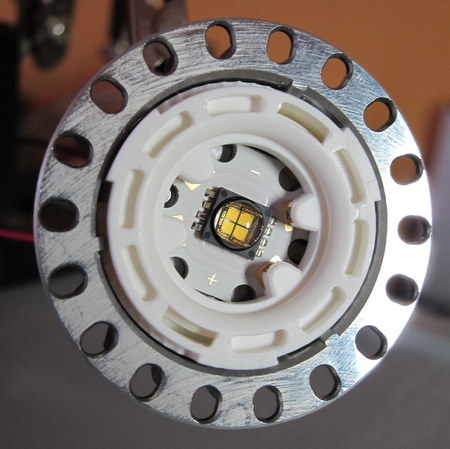
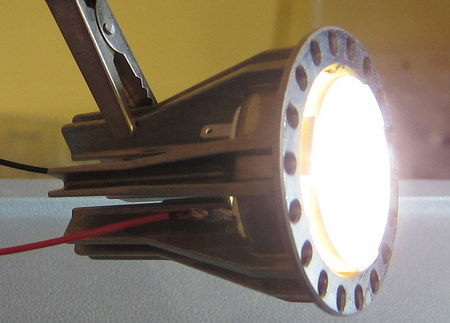
To put them into the base I drilled holes for the mounting and then used 14 gauge copper wire to wire the mounts together - physically that's very secure - the mounts have no way to fall out of the holes since they're holding each other together.

First look
I then mounted the dimmer potentiometer and the power input (24VDC running to a boostpuck) connector. Here are photos with a temporary lamp shade on top. The first shot has no dimmer and the top's not yet cut. The second shot has the dimmer pot needing trimming. Also, here the top is trimmed and I've dimmed the lamp a lot so the camera would get a shot showing light.
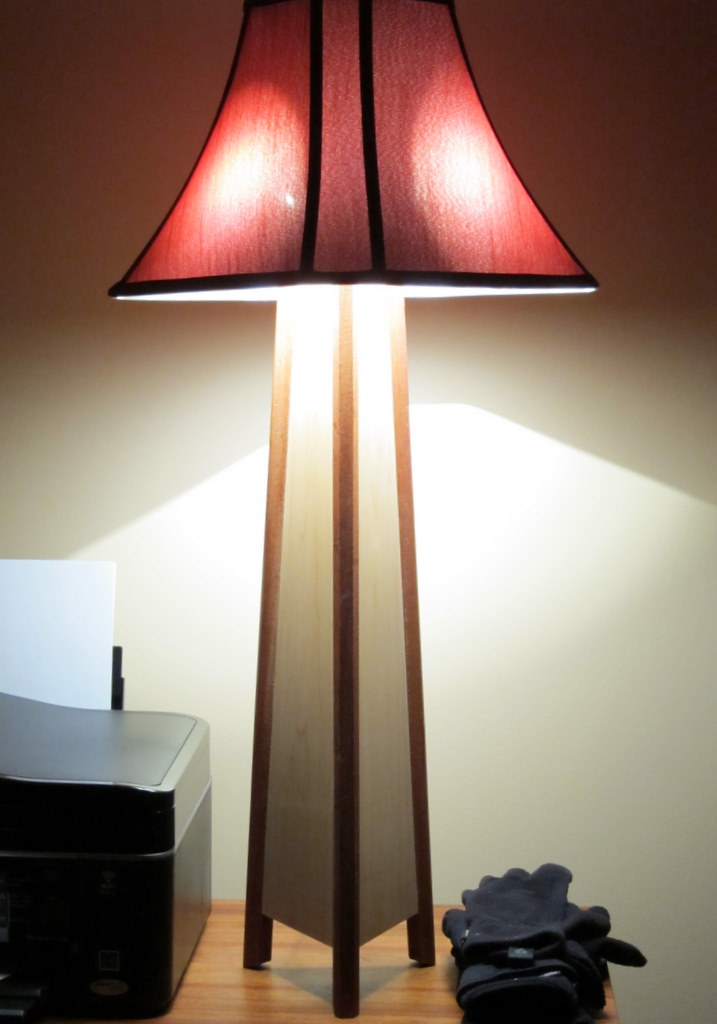
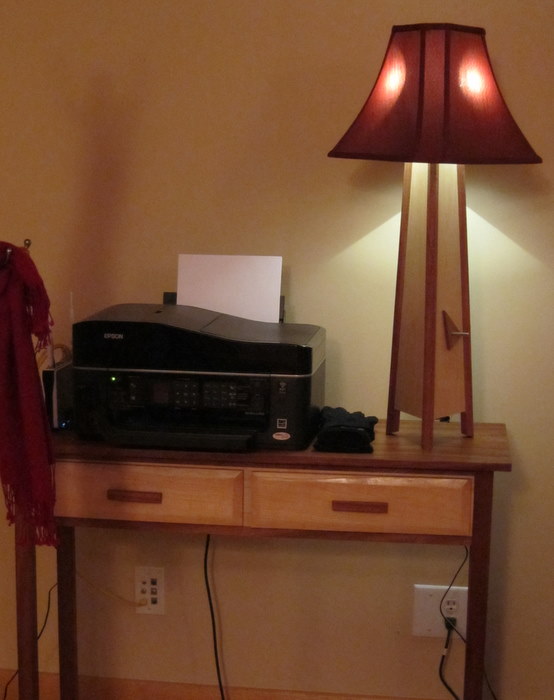
Here it is finished with the same (ugly) shade.