Grizzly G0514X2 19" Bandsaw Review
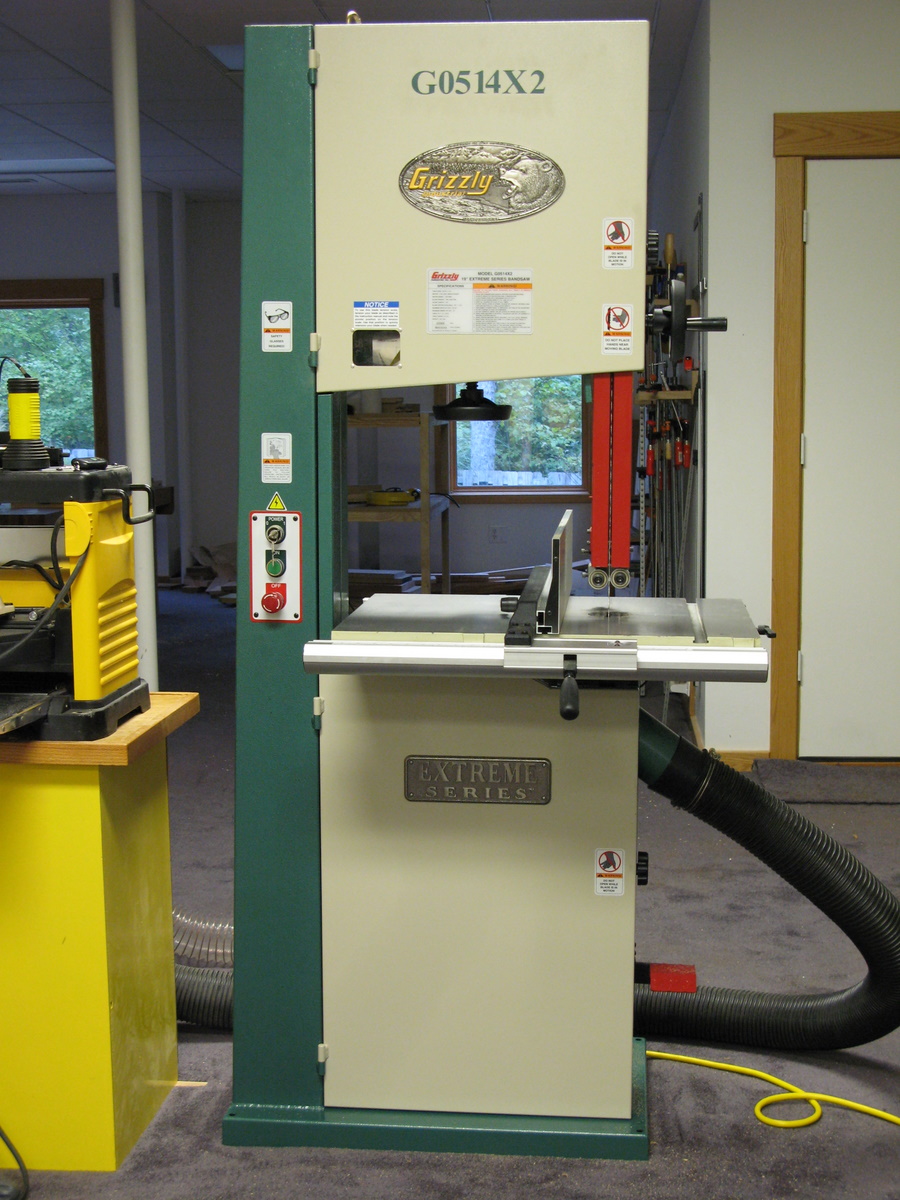
For reasons too lengthy to get into I recently bought a Grizzly G0514X2 19" bandsaw which I've now used a little and I thought before I forgot the installation process I'd do a quick review... so here it is.
See here for a discussion of the ruler.
Shipping
All 480lbs (shipping weight) of the saw are shipped via UPS. They emailed me the night before to ensure I'd be there to deal with it and the driver was willing to lower it from his liftgate and leave it at my door. Luckily I was able to round up 2 able-bodied guys to help and we pushed it into my minivan which I then drove to the door of my workshop. We were barely able to push it out of the minivan onto the floor.
I then removed the crate. The crate is a frame box made from pine and the saw is in a large plastic bag inside. Kind of odd but honestly adequate, although I wish I knew what to do with the crate other than landfill it.
Assembly
The assembly instructions are good and bad. The good is that they walk through each step moderately slowly. The bad is that there are no pictures of screw+washer so you're always wondering if you got the assembly correct (i.e. does the lock-washer come first or second or the big washer first or between the objects?). They have a screw size chart in the manual of dubious value. Also, there's no real indication of what objects come where. I found a bunch of stuff in two boxes in the plastic bag/shrinkwrap and more stuff in the bottom wheel compartment.
I couldn't find the trunnion screws and tools (they provide the hex drivers and the necessary open-end wrench, which is pretty nice). They were wrapped in with a handle so well I couldn't find them until the next morning. Some indication of where stuff is packed would be great.
Assembly was smooth and everything went together flawlessly. I had knocked the off switch askew when I uncrated but I was able to take off the electrical panel and just rethread the cover nut. When I got 'all done' assembling the saw I had 4 washers left (oops-fixed).
At the 'turn on the saw' part all of a sudden I realized there was no cord. They don't supply the electrical cord! A trip to bigbox hardware and a screwdriver took care of that, but it seemed odd; though now my cord is exactly the right length, so maybe it's a good thing. It's the long yellow tail you see in the photos.
I turned on the saw and thought it had seized up. No noise... but it was running fine. What a quiet saw.
Alignment
After turnon you get to alignment. After about 4 minutes of alignment with the blade they provide I decided I'd better switch to my main resaw blade (a 1.25" 1.3tpi 'cheapo' I bought from grizzly).
I tried installing the blade without reading the instructions (always a duh) and didn't back off the rear bearing enough so that the blade twisted as I tried to get it between the side bearings. This gave me a dubious blade so I switched to a slightly higher quality blade (the Grizzly/Timberwolf 3tpi Rake 1" blade).
Alignment of the bearings is tough for me. I don't quite focus right. You're supposed to use a feeler to set the top-rear bearing gap but there's no way to get a feeler gauge in there without removing the blade guard. I was almost totally unable to loosen the top-left bearing because the hex screw is in a pretty hard-to-get-at place. I have a lot of trouble seeing the bottom gaps because the table gets in the way of your head.
I ended up just eyeballing the bearings and (I think) leaving a little more gap than speced because of slight blade wobble. A strong backlight and good glasses help, but it's still painful.
Tension Adjustment
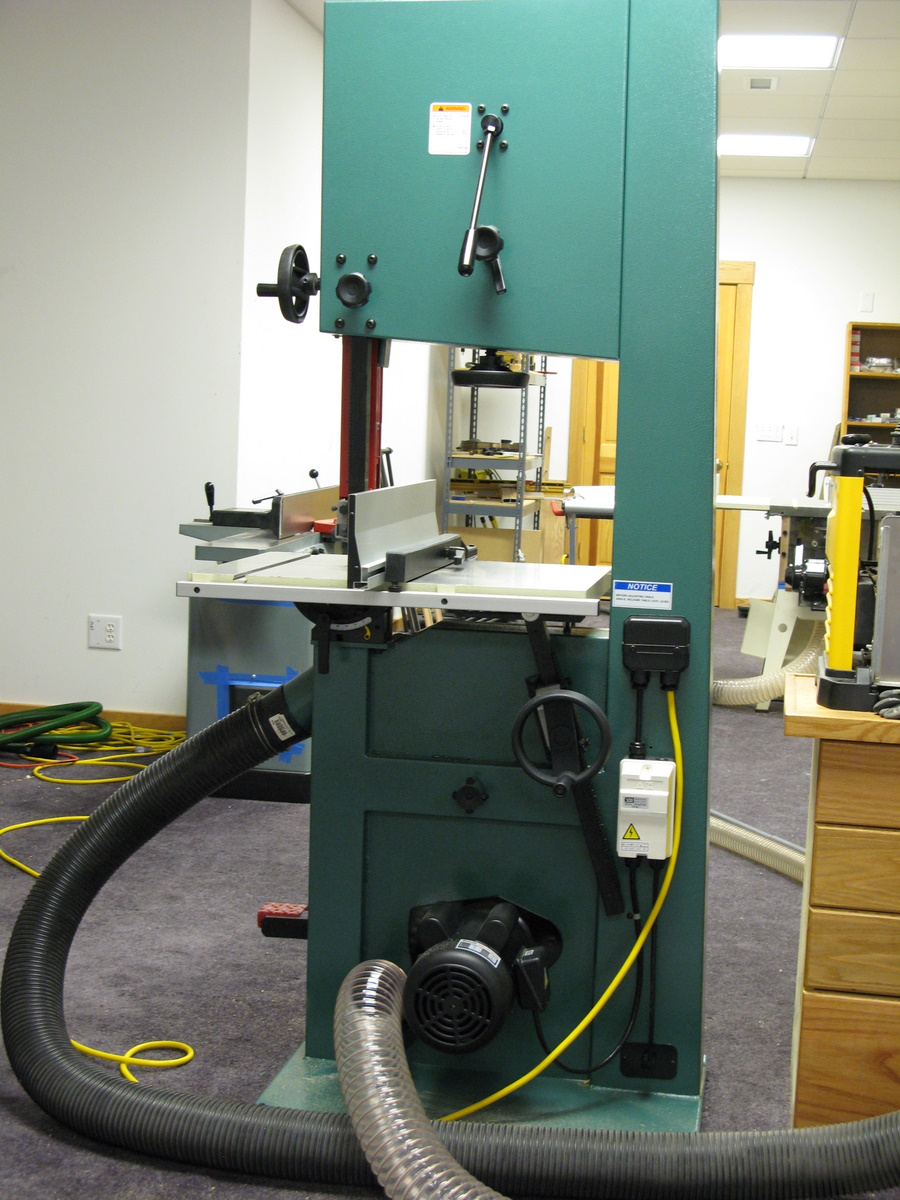
There's a quick release tension adjust lever (see back picture of saw with long lever middle top) that when open releases the tension (mostly). I assume this is to leave the saw untensioned between uses. I ran the saw by mistake once with the lever up - oops - never do that. An interlock would be nice.
You're expected to adjust tension by the flutter method. I hate methods where I'm expected to observe some non-obvious behavior. I'd rather have a tension readout.
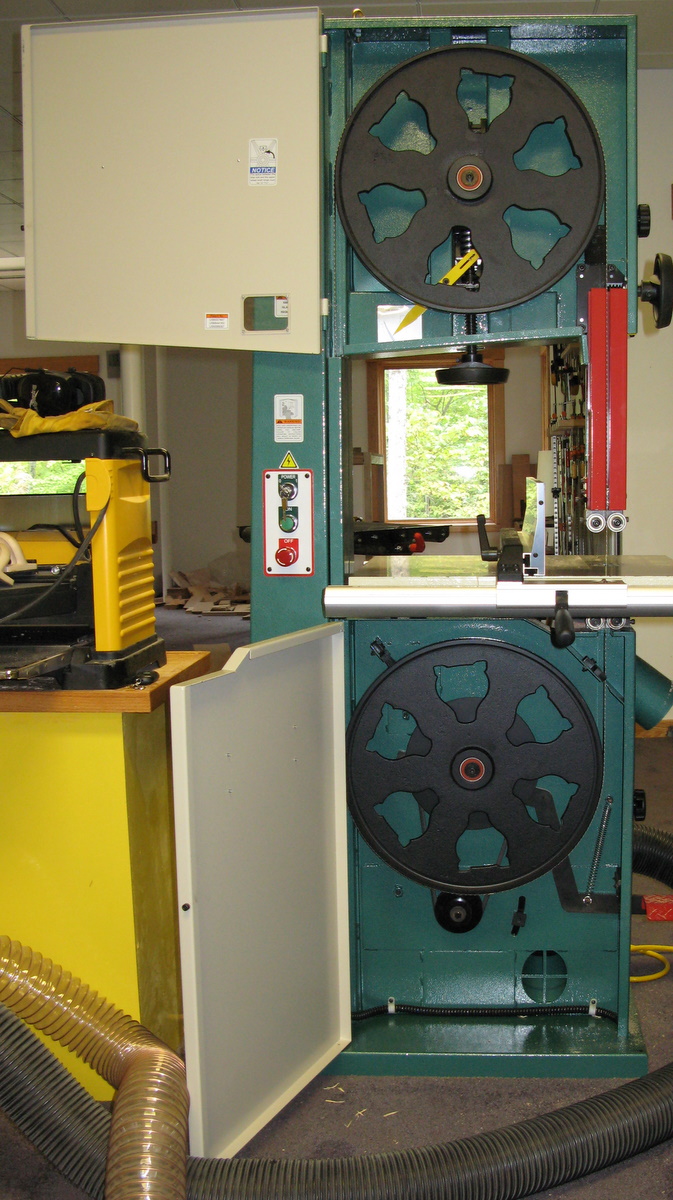
Wheels
I noticed a slight back and forth wobble when running and did a serious test of the top wheel for runout. I couldn't find any at all. The blade turned out to have a slight heel at the weld.
Dust Collection
The saw has two 4" dust ports. They seemed to do a good but not perfect job. Mainly some dust on the table for rip cuts, more for large resawing. If you don't hook up dust collection, it's a (recoverable) mess, but I don't recommend it. The dust collection could be improved by sealing up the trunnion area but that would make it tough to align/view the bearings so I guess I'd rate it as very good.
Foot brake
The saw has a mechanical foot brake that works fine (and it switches off the motor as well). I've watched the saw slow down inertially and that blade remains dangerous for a long time. I love the brake.
Blade Changing
Changing blades is ok. To remove the blade you have to open both doors totally (180) which means leaving space to the left of the saw - something I did not do. Once you do that it's easy enough to get the blade off the wheels (although the door hinges get in the way) but tough to get it out of the lower rear bearing container if the blade is wide.
After installing the new blade you have to reset the bearings. I found it was important to set the tension first and get the blade correctly positioned (maybe by running it for a second). Even then it was hard to get the bearing gap as tight as Grizzly recommends because of slight blade irregularities - or it would make slight ringing noises.
I think narrower blades are much easier to deal with. With some practice I should be able to eyeball align a new blade in maybe 3 minutes. Kind of a pain.
Speed Adjustment
You can adjust the saw to two different speeds. I assume it's on the fastest of the two. Changing speeds is ok but you have to move the motor and retension the belt.
Fence
The main fence is a polished cast iron fence. You can adjust for drift with 4 screws that use the same hex driver provided with the kit. It feels pretty solid and seems to work well.
Grizzly provides a resaw fence addon that increases the height. There's no way to move the tape measure glued to the fence rail so it only reads accurately with the main fence (the resaw adds width). You can find out the offset and add it in each time, but that's a pain. I could have done without the metric and used a 'with resaw' inches instead although I know that's not pc.
I didn't feel like I got great support from the upper reaches of the aluminum resaw fence - maybe I'm too used to my ultra-solid tablesaw fence.
Documentation
As noted the assembly doc could have been better. The alignment and day-to-day documentation are excellent with clear wording and nicely labeled b/w photos.
Sawing Performance
I haven't done much sawing yet. With the resaw blade the rip cut was good - clean and flat albeit not jointer smooth. I could run a 6/4 hickory piece through just as fast as I could smoothly push it. I measured the thickness of the cut and it was +-.003" front to back (for a foot-long piece of wood) after I set up the fence. Really nice.
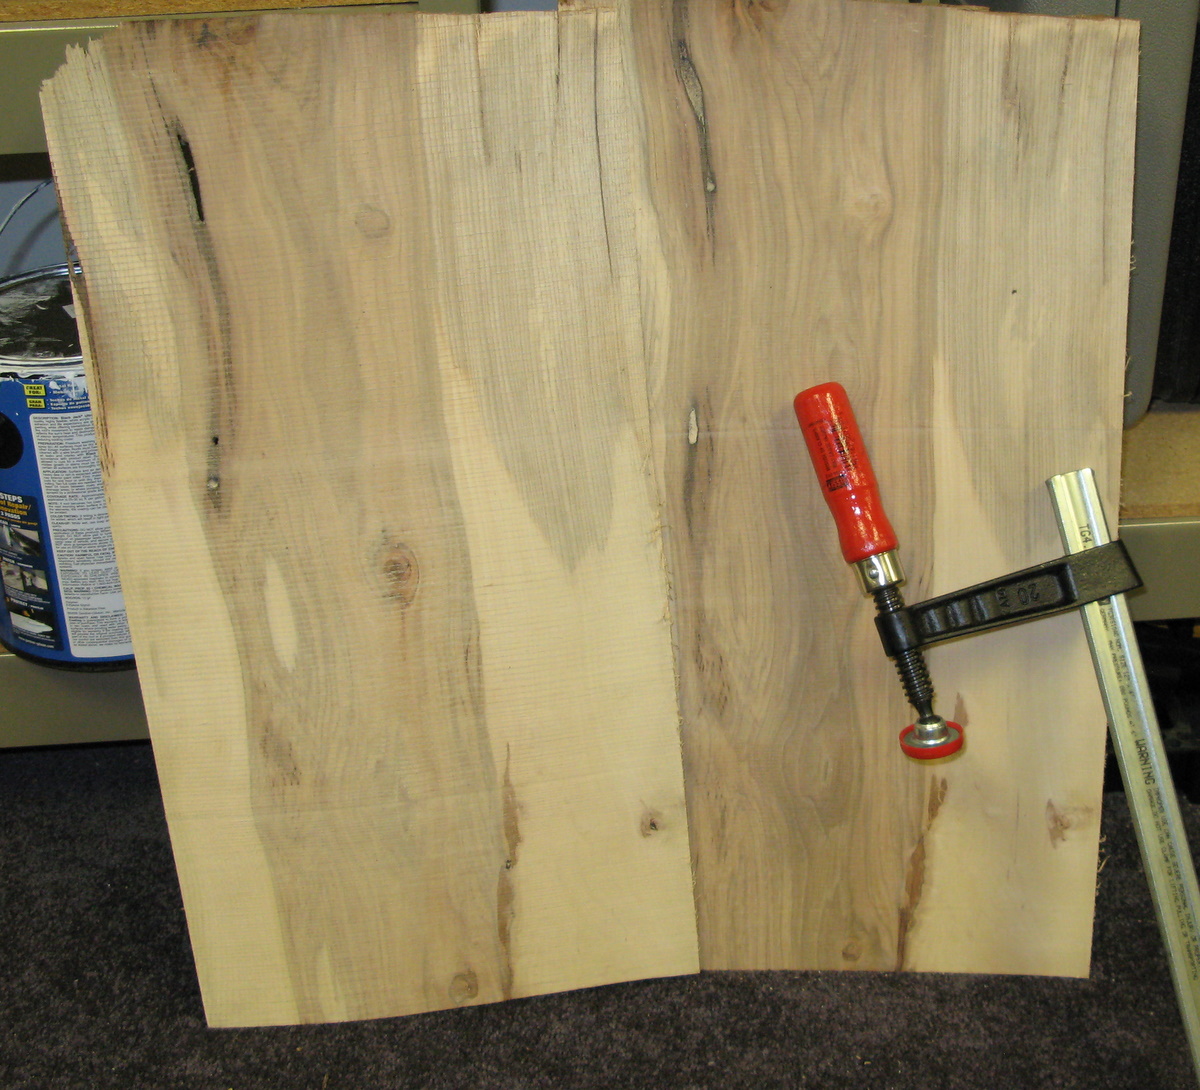
More important, I tried resawing a 2 foot long 12" piece of hickory and it went through smooth as silk. I couldn't run superspeed but at a moderate speed it was quiet and happy and the cut quality was the same as the rip.
The last photo shows the resaw of the 12" piece of hickory. The cut surface on the left was done with a 1.2tpi blade and the right with a 3tpi blade. Both are really resaw blades and I expect a rough cut although the 3tpi is decent. I'm sure a higher tpi would cut smoothly. Both went easily through the wood block (the 1.2 a little faster). The one flaw on both cuts is apparently where I switched push sticks and stopped the wood for a second.
Overall
So far I'm happy with the saw. The motor seems to have plenty of oomph and the sawing performance is very good. I wish the bearings were a bit easier to adjust but otherwise I have zero complaints.
Mark
Postscripts
Table Angle
I aligned my table angle precisely (for the first time, oops) since I had moved it to cut something at 30 degrees. When I did I noted that tightening down against the stop screw causes the table to torque. ? Going to 0 just right requires some delicacy.
The Fence Ruler
The ruler on the bandsaw fence is just awful. It shows metric and english units and neither are that legible because the numbers are at the top/bottom and the reticule is a large circular bubble. In addition, the ruler doesn't show anything useful if you have the resaw fence on (that adds imprecisely 1 3/8"). I finally bought a stick-on right-left tape measure from Rockler and glued it over the metric units to show the resaw distance. Note the improvement in readability. What ergonomic genius used small black letters on dark orange at the top of a bubble? I'm thinking of taping over the English units as well...
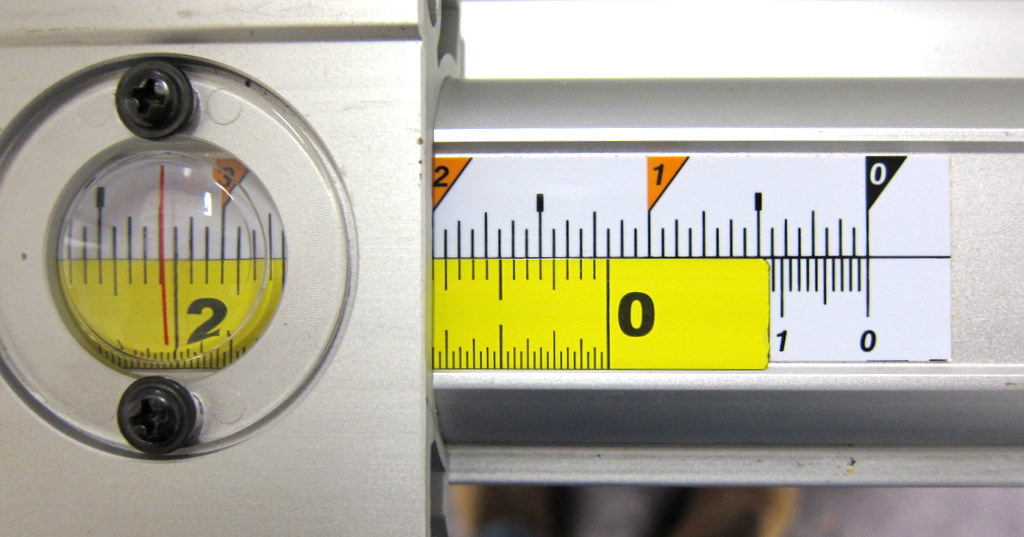
Can you read the top number in the bubble? Want to guess? Click for a larger image - note the number is optimally located in the reticule and you can still barely read it.